Project Component Overview
Project Catalog
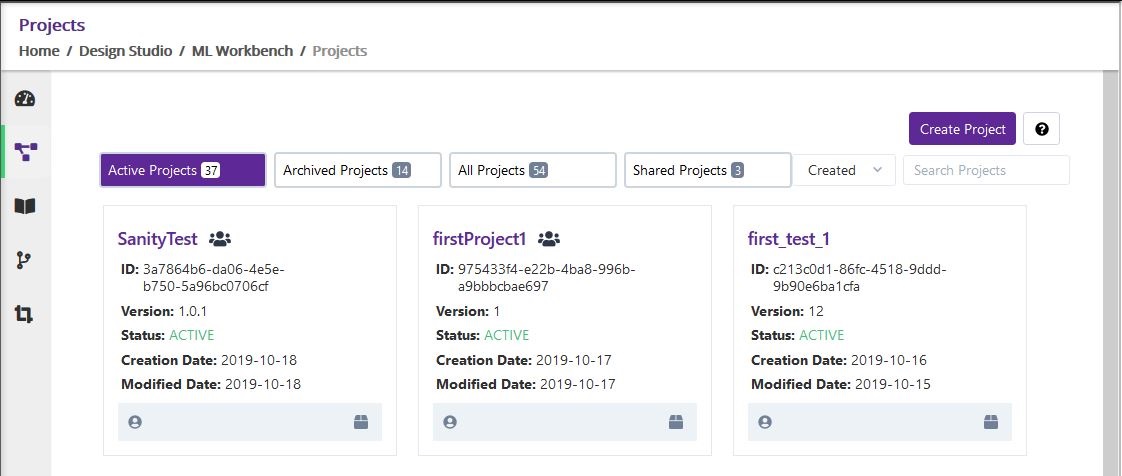
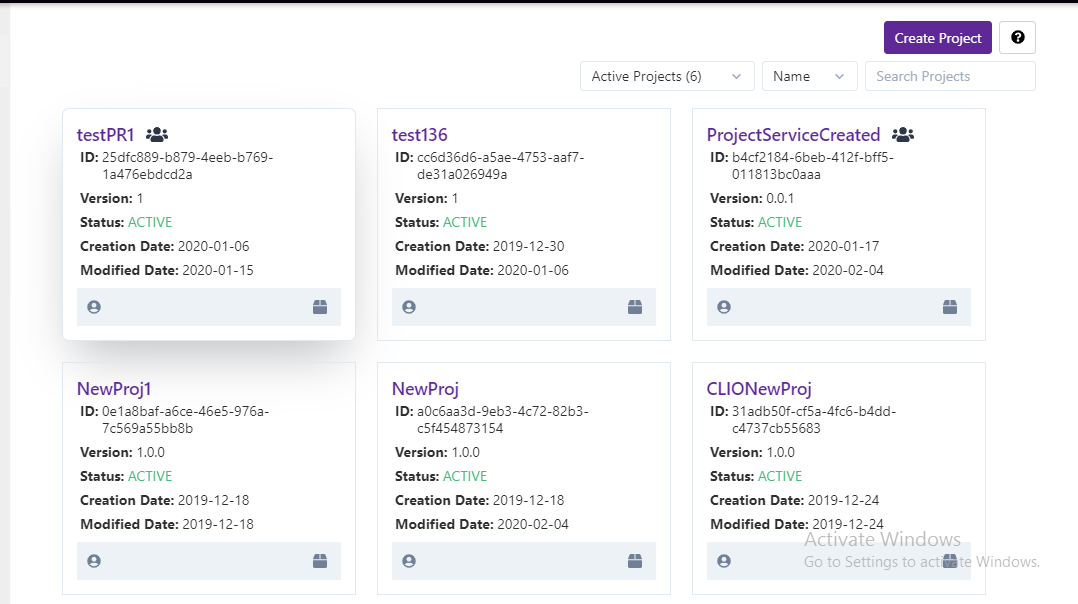
Project Catalog screen displays list of projects which are created by user. There are following ways to navigate to the Project Catalog screen.
Either click on ‘Project’ card from Dashboard screen
Or click on the ‘Project’ link from sidebar navigation
From Project Catalog screen, user can perform either of following actions.
- Create Project
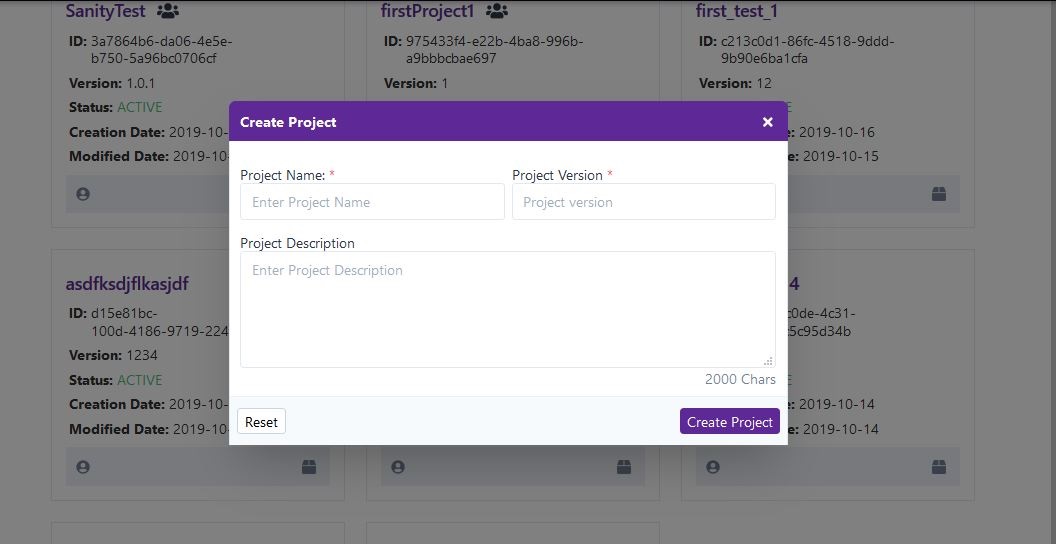
By clicking on ‘Create Project’ button present at top right corner, a dialog box will get open. Fill out all required information and click on the ‘Create Project’ button. After successful project creation, User will be able to see that created Project inside ‘Active Project’ tab.
- Archive Project
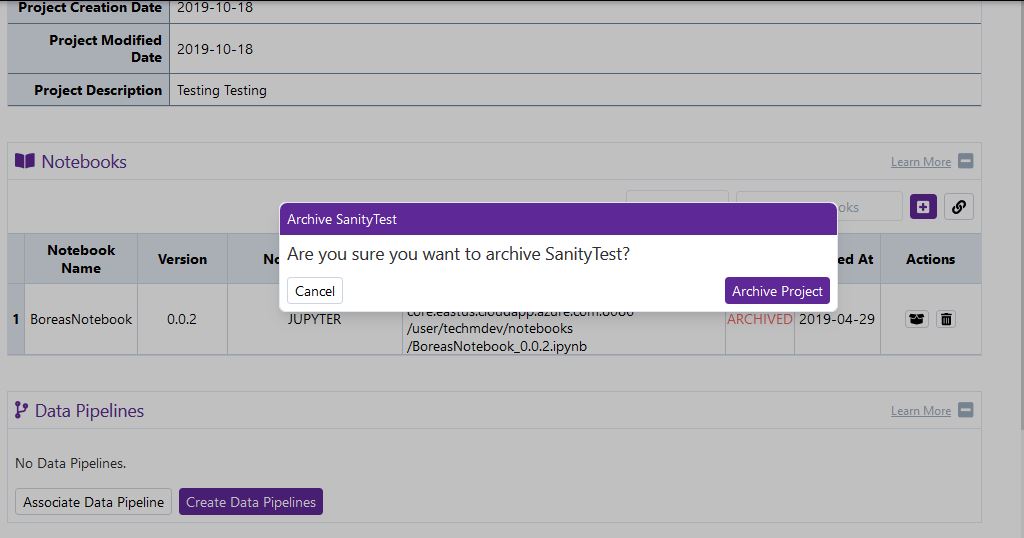
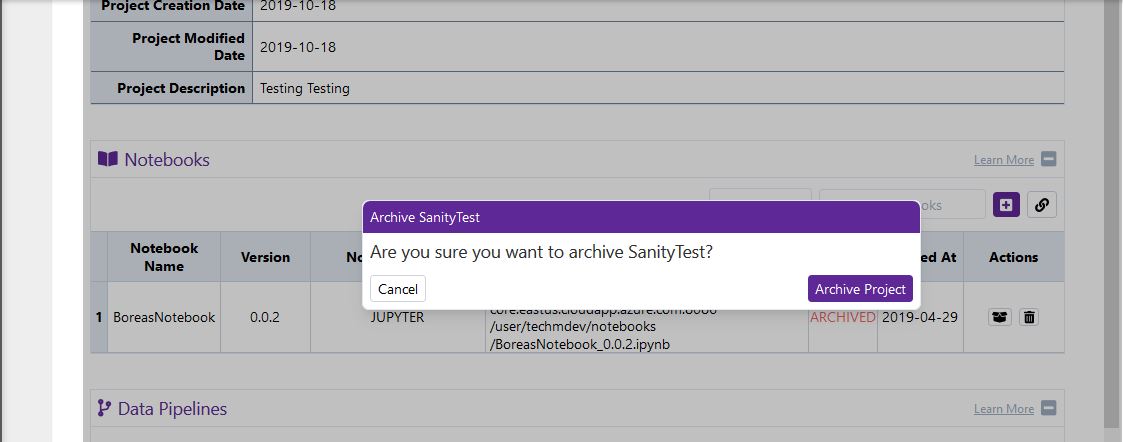
If user wish to Archive any Active Project then user can click on the Archive button present at the bottom right corner of that specific project card. A confirmation dialog box will appear on click of Archive button. After confirmation, project will be archived and user can see that project inside ‘Archive Project’ tab.
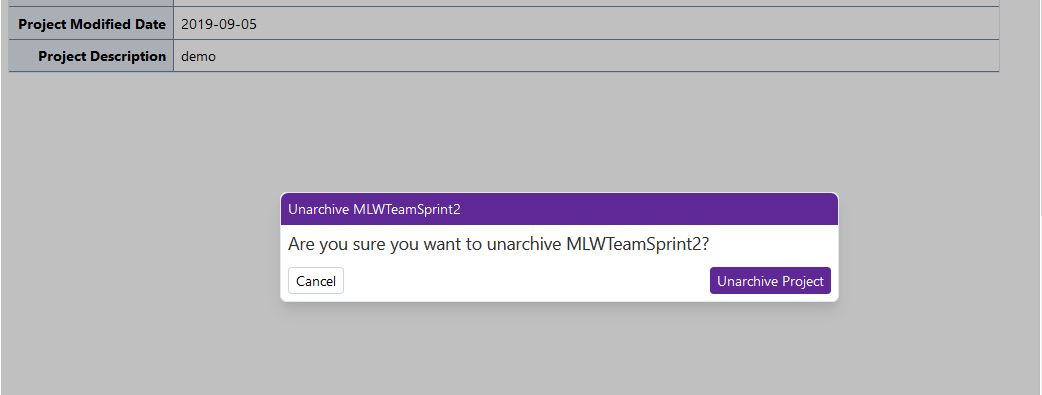
- Unarchive Project
If user wish to Unarchive any Archived Project then user can click on the Unarchive button present at the bottom right corner of that specific project card. A confirmation dialog box will appear on click of Unarchive button. After confirmation, project will be unarchived and user can see that project inside ‘Active Project’ tab.
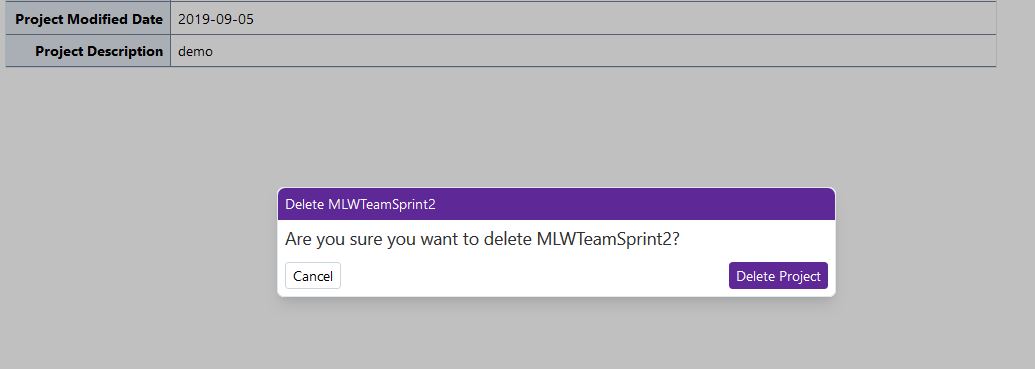
- Delete Project
If user wish to Delete any Archived Project then user can click on the Delete button present at the bottom right corner of that specific project card. A confirmation dialog box will appear on click of Delete button. After confirmation, project will be deleted physically from database and can not be restored.
Project Catalog screen includes following features/capabilities.
- Project Filter
Project Catalog screen has three different tabs named as ‘Acitve Projects’, ‘Archive Projects’, ‘All Projects’ and ‘Shared Projects’ which basically provides filter capability based on ‘Project Status’. If user wish to see only ‘Active’ project then user can choose ‘Active Projects’ tab. Similarly if user wish to see all projects then user can choose ‘All Projects’ tab and if the user wants to see all the shared projects then user can choose ‘Shared Projects’.

- Project Sorting
User can sort the project list by choosing either one of following options - By Project Created Date, By Project Name.
For Project Created Date

For Project Name
- Search with Project metadata
Project Catalog screen provides textual search capability as well where if user wish to search for specific text present in Project metadata then user can enter into the search box (present at the right top corner) and projects matching with the entered search criteria will get displayed.

- Pagination
In Project catalog screen, at a time only 8 projects will be displayed. User can use Pagination feature to navigate to another page if user wishes to see other project lists.
Project Details
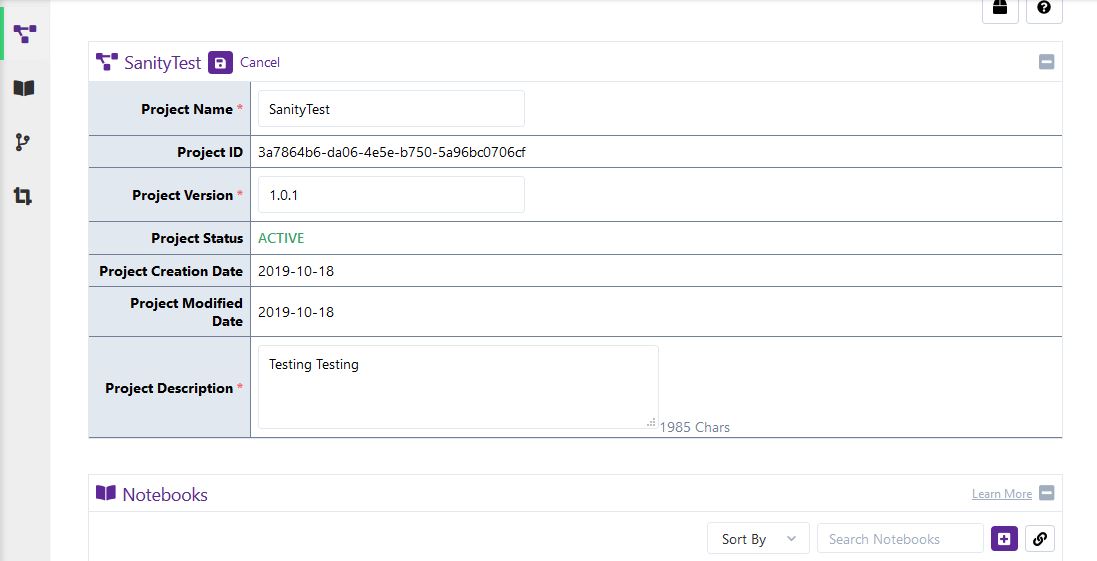
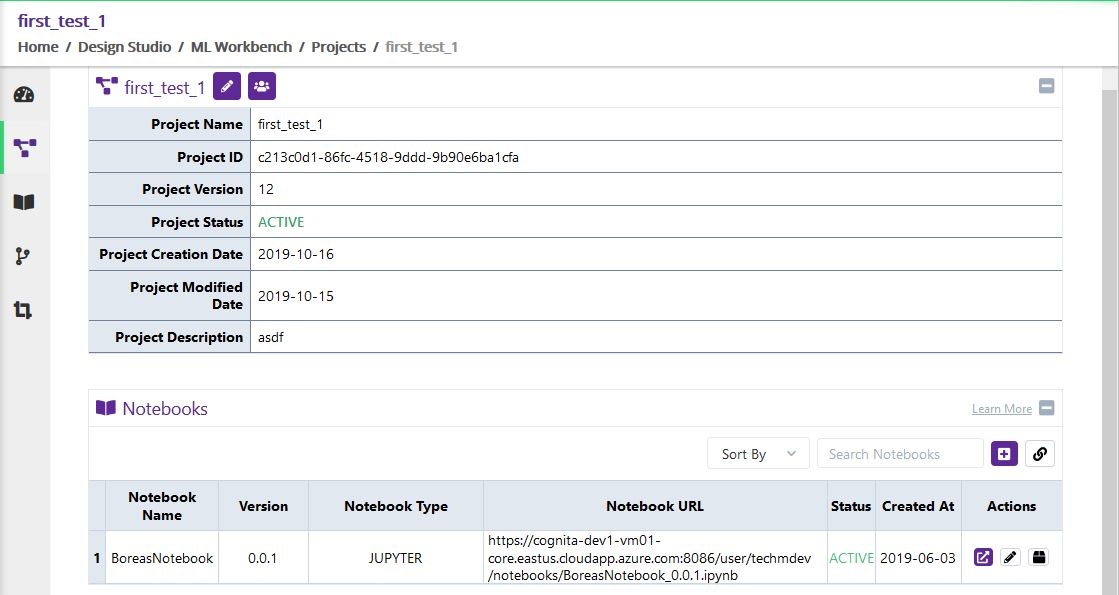
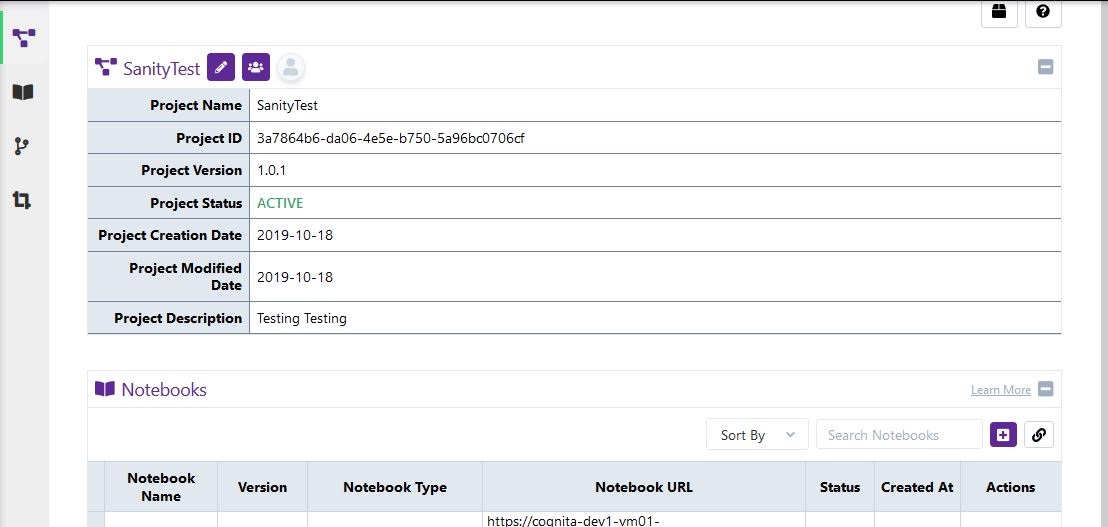
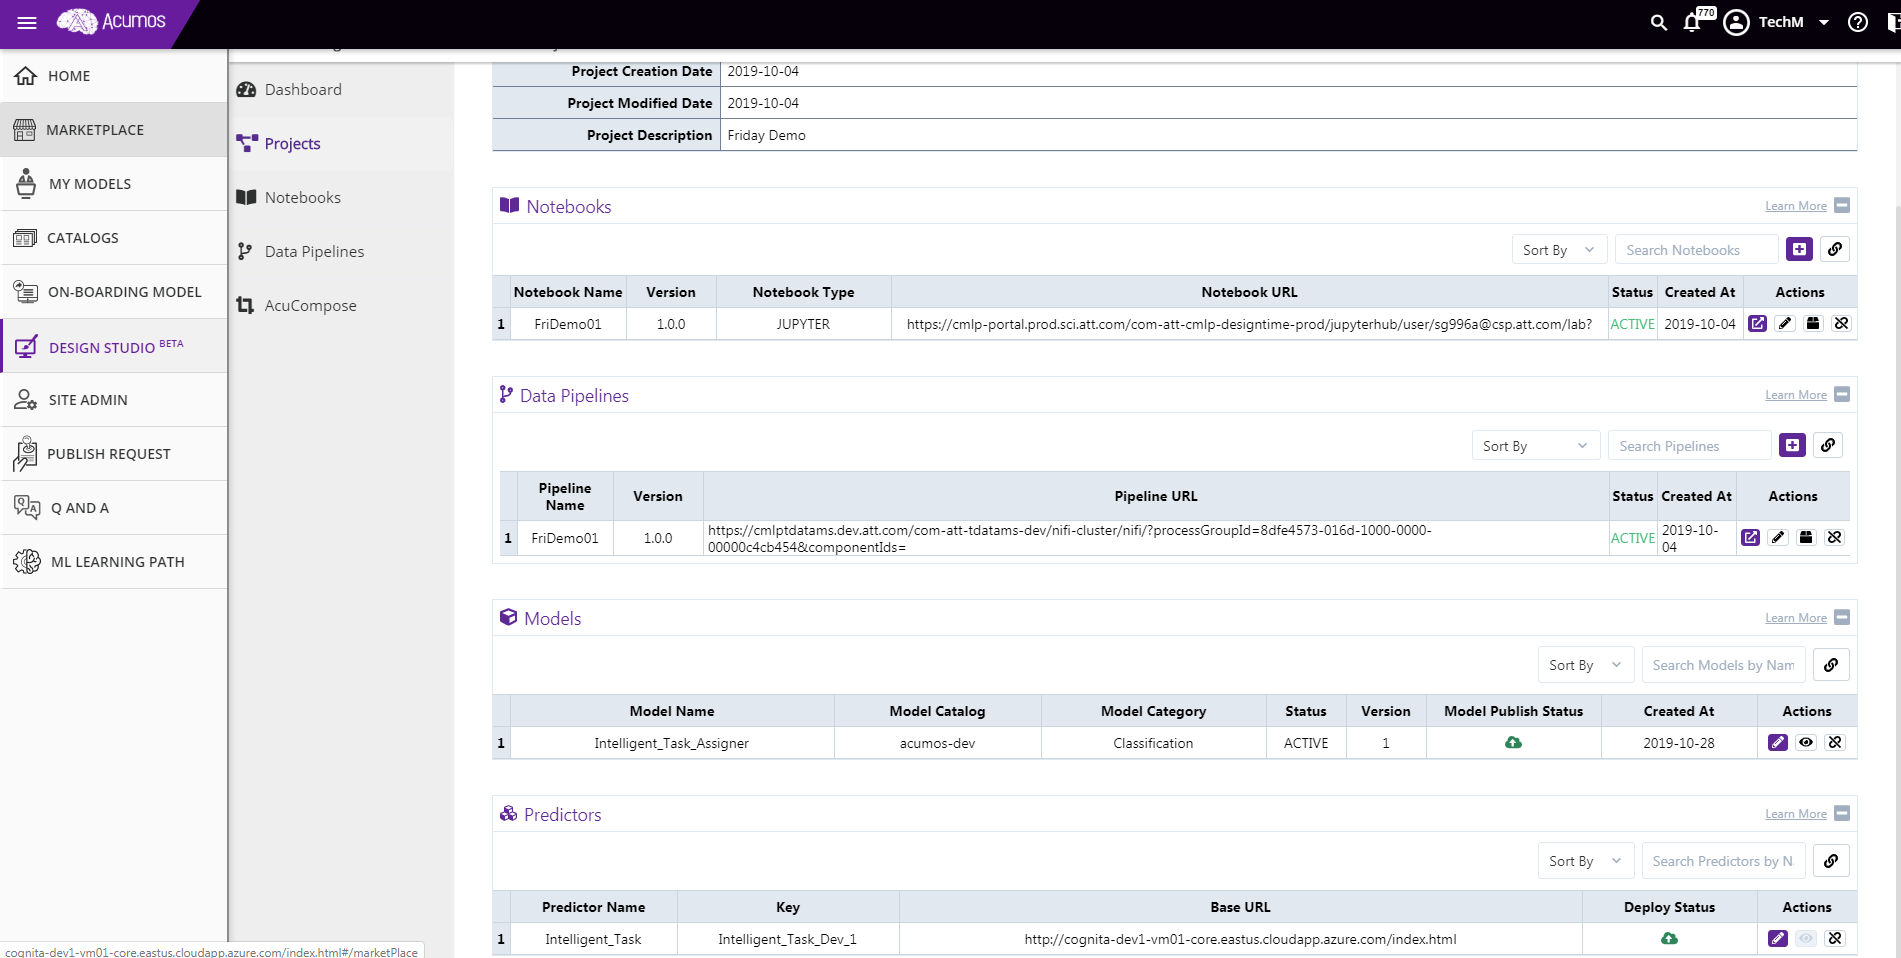
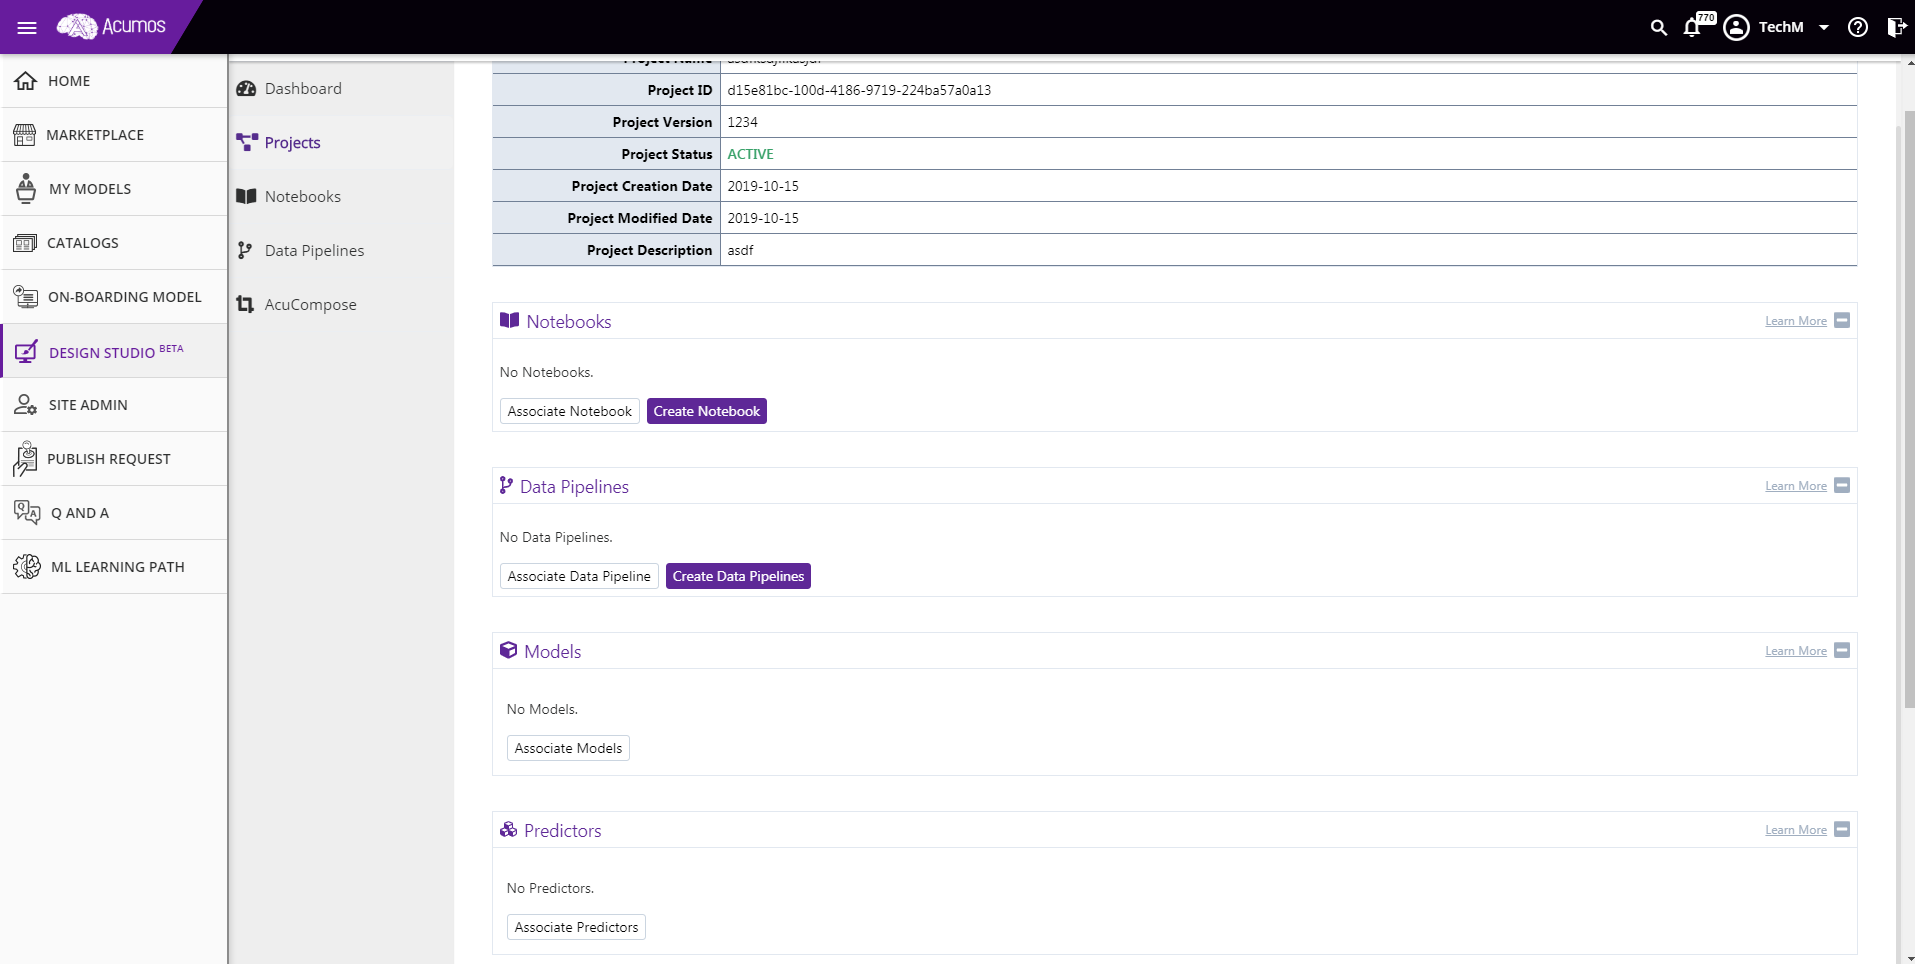
On click on specific Project card in the Project catalog screen, user will be redirected to the Project details screen. In this screen, Project basic details will get displayed along with associated notebook details.
In the Project details screen, user can perform following Project relevant actions.
- Edit Project
To Edit the Project, click on the ‘Edit’ icon present on the card-header of the Project. On edit, project name, version and description field will become editable. User can provide new information and save it.
- Archive Project
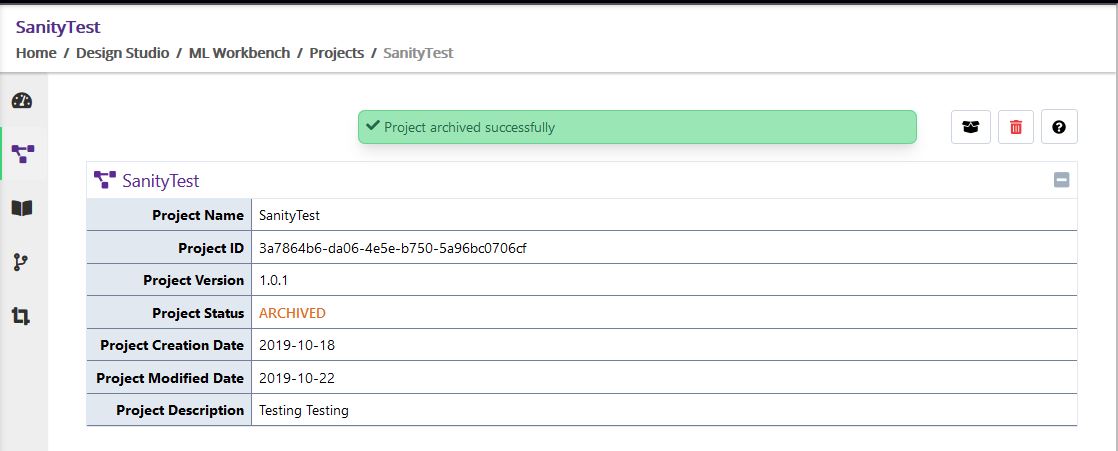
To Archive Project, click on the Archive button. After user confirmation, project will get archived and status will be reflected in project details
Note
If project is archived then Notebook and Pipeline section will not be displayed for that project in the Project Details screen.
- Unarchive Project
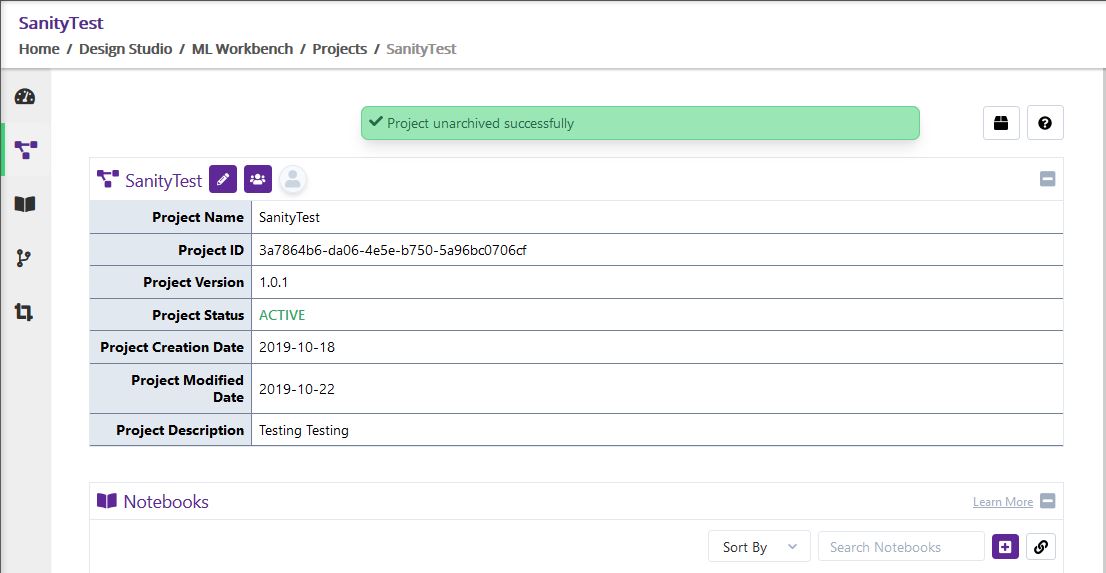
To Unarchive Project, click on the Unarchive button. After user confirmation, project will get unarchived and status will be reflected in project details
- Delete Project
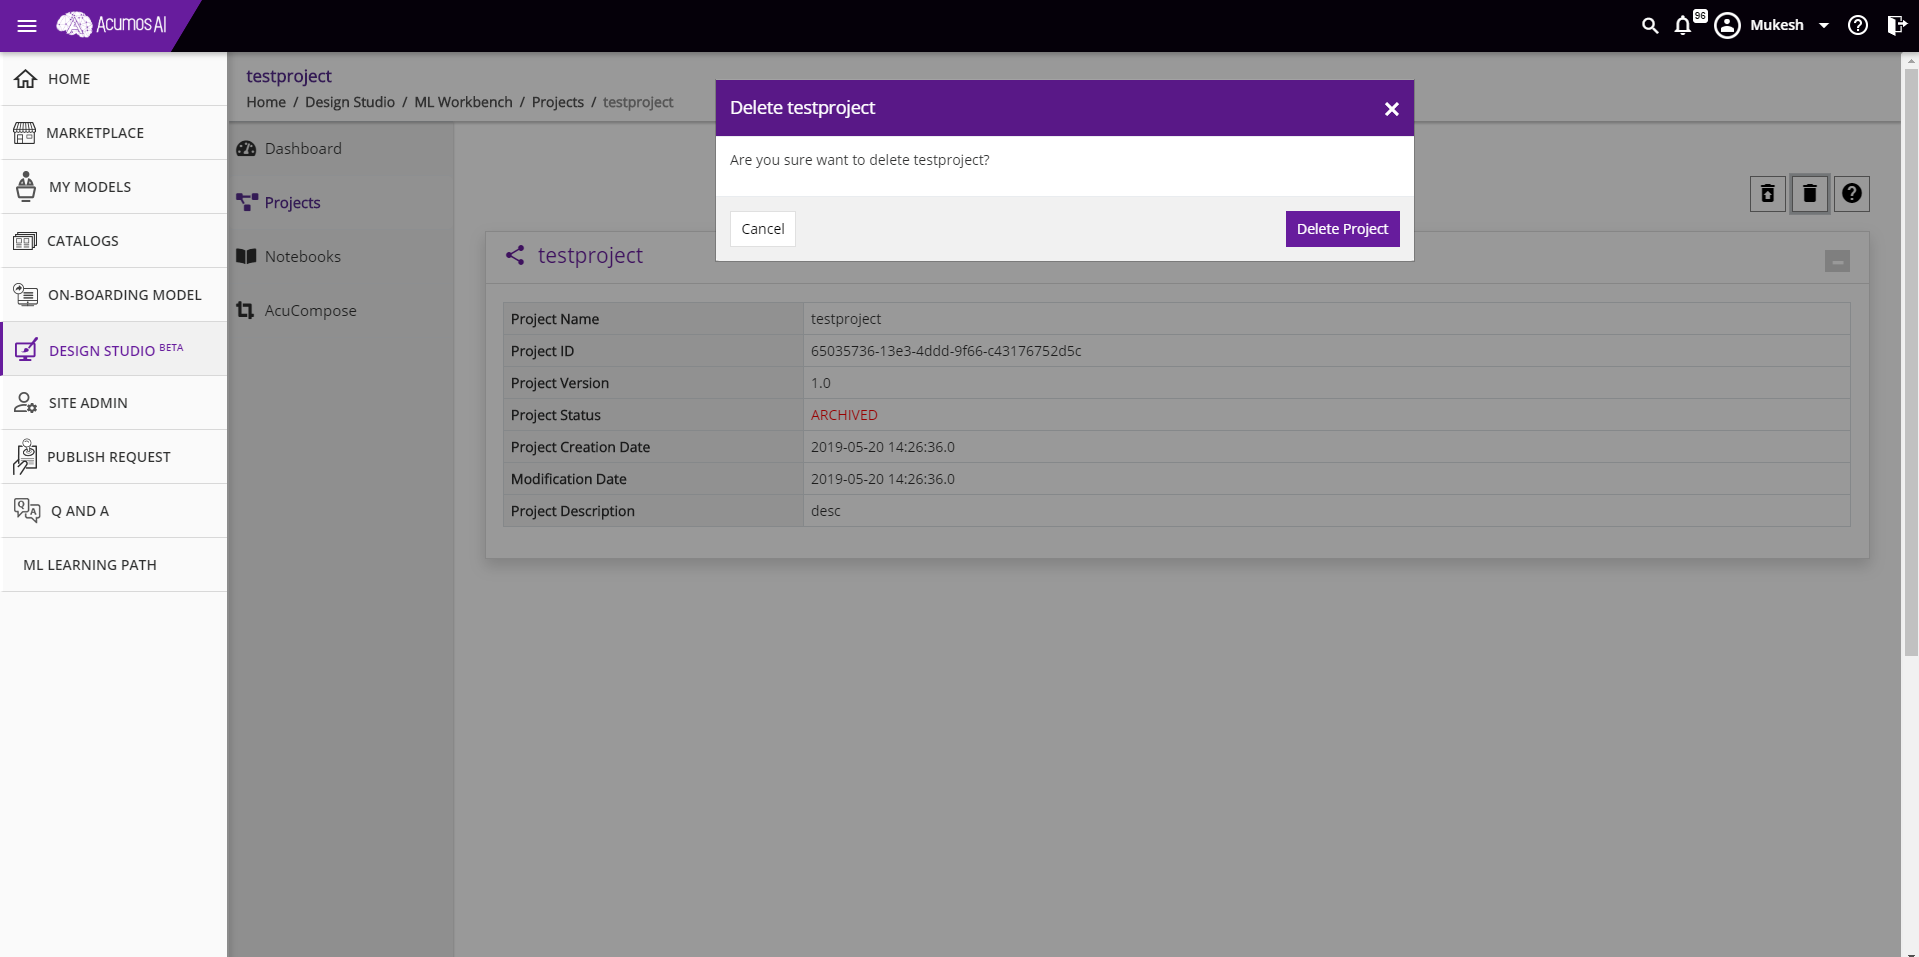
If project is archived then Delete button will be enabled for a user to delete the project. On click of Delete Button, Project will get deleted and user will be redirected to the Project Catalog Screen
- Notebook Section
Notebook section will display all notebooks which are associate with the project. Notebook lists will get displayed in tabular format showing Notebook name, version, type, status, created date etc.
If there is no notebook associated to that project then two options ‘Create Notebook’ and ‘Associate Notebook’ will be displayed to the user in this section.
Following are the user actions available in the Notebook section:
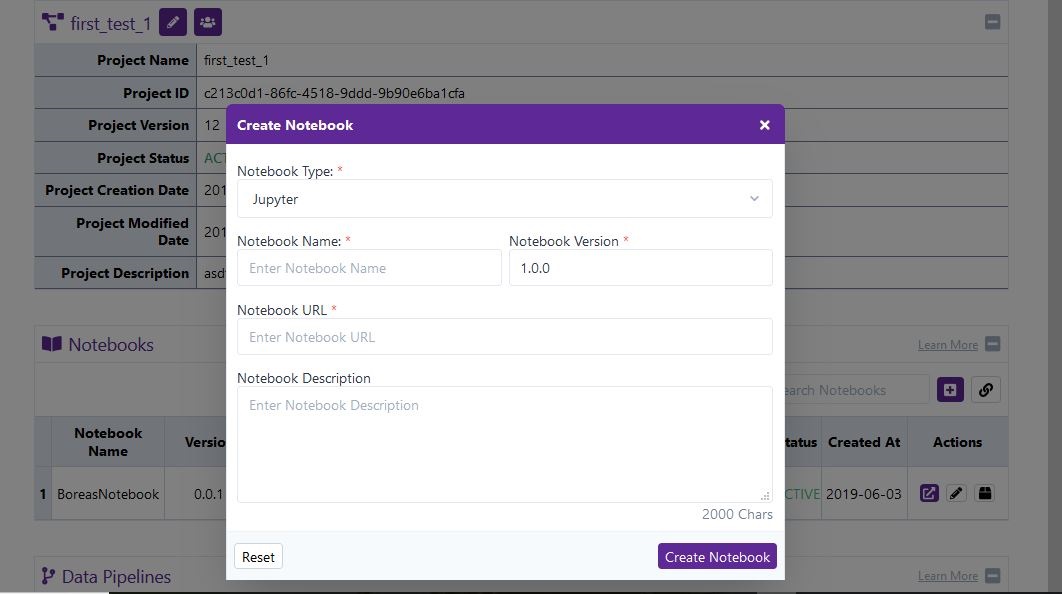
Create Notebook:
If there is no notebook associated already for a project then user can create a notebook by clicking on the ‘Create Notebook’ button. Or else, user has to click on the ‘+’ sign displayed on the right top corner of the Notebook section for same. On click event, a dialog box will appeared where user has to fill out all required information and submit. On successful Notebook creation, notebook will get displayed in the tabular list.
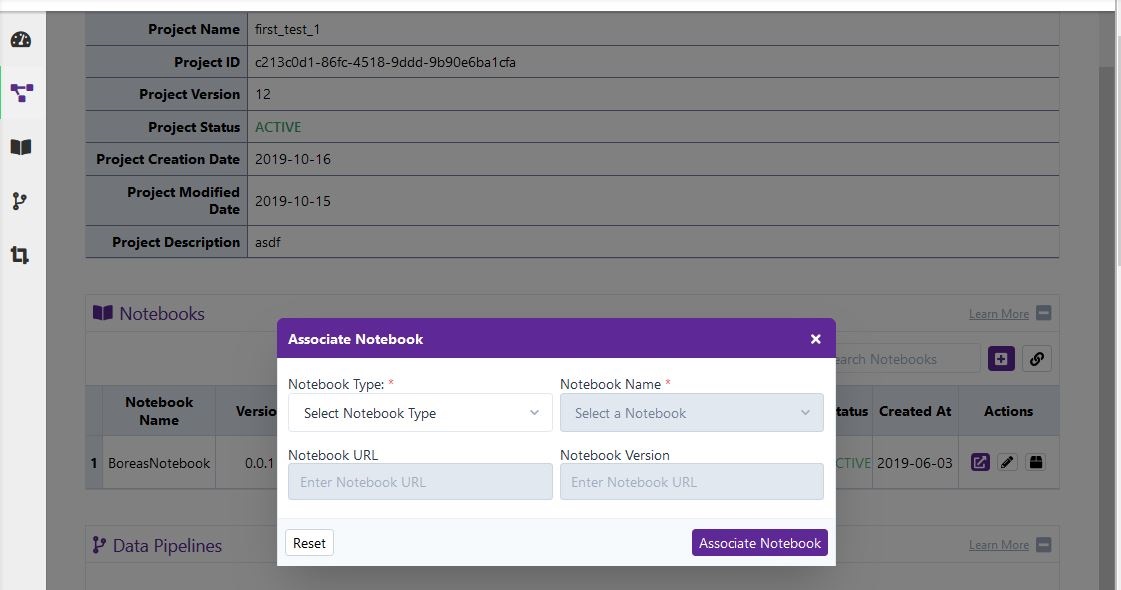
Associate Notebook:
If there is no notebook associated already for a project then user can associate an existing notebook by clicking on the ‘Associate Notebook’ button. Or else, user has to click on the link button displayed on the right top corner of the Notebook section for same. On click event, a dialog box will appeared where user has to select the desired notebook from drop down and submit. On successful Notebook association, notebook will get displayed in the tabular list.
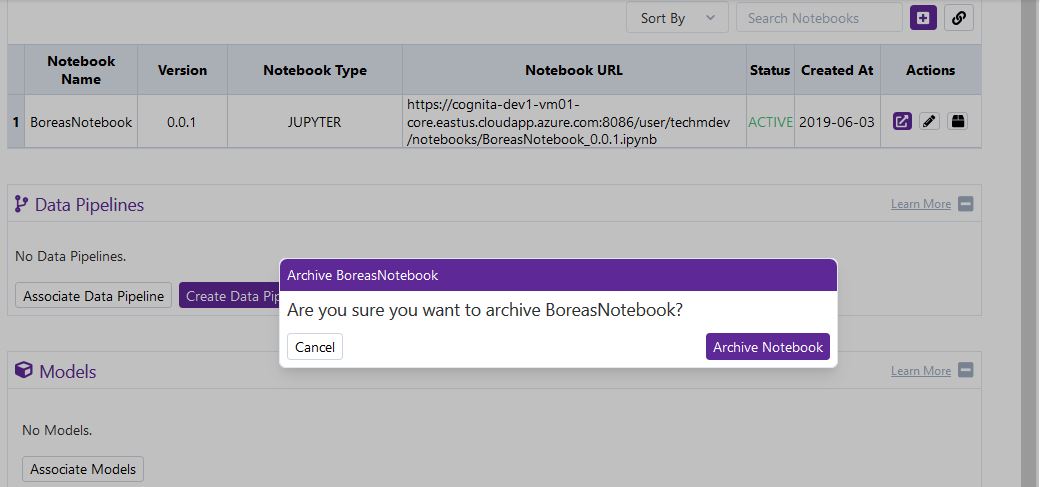
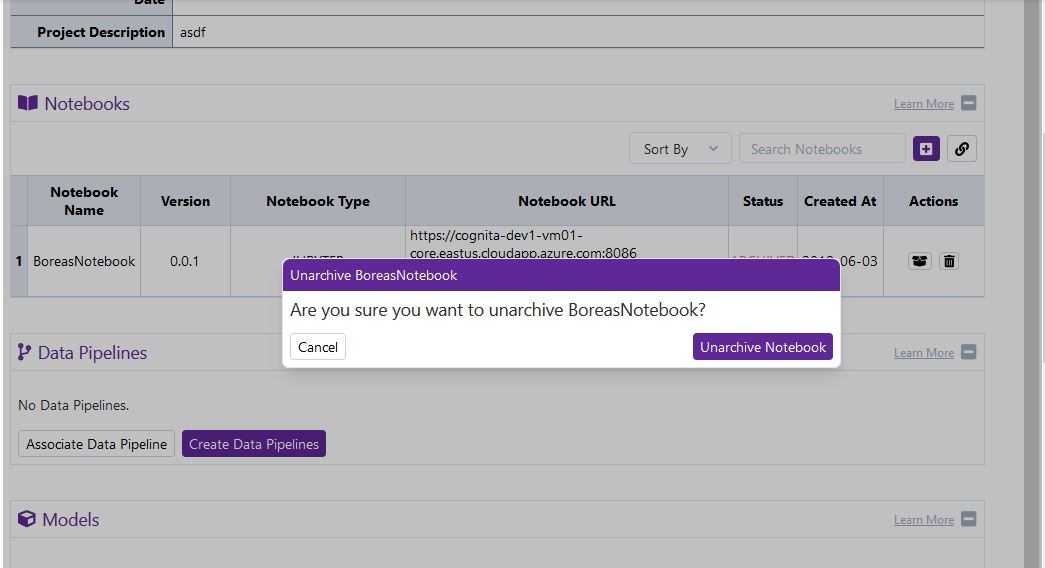
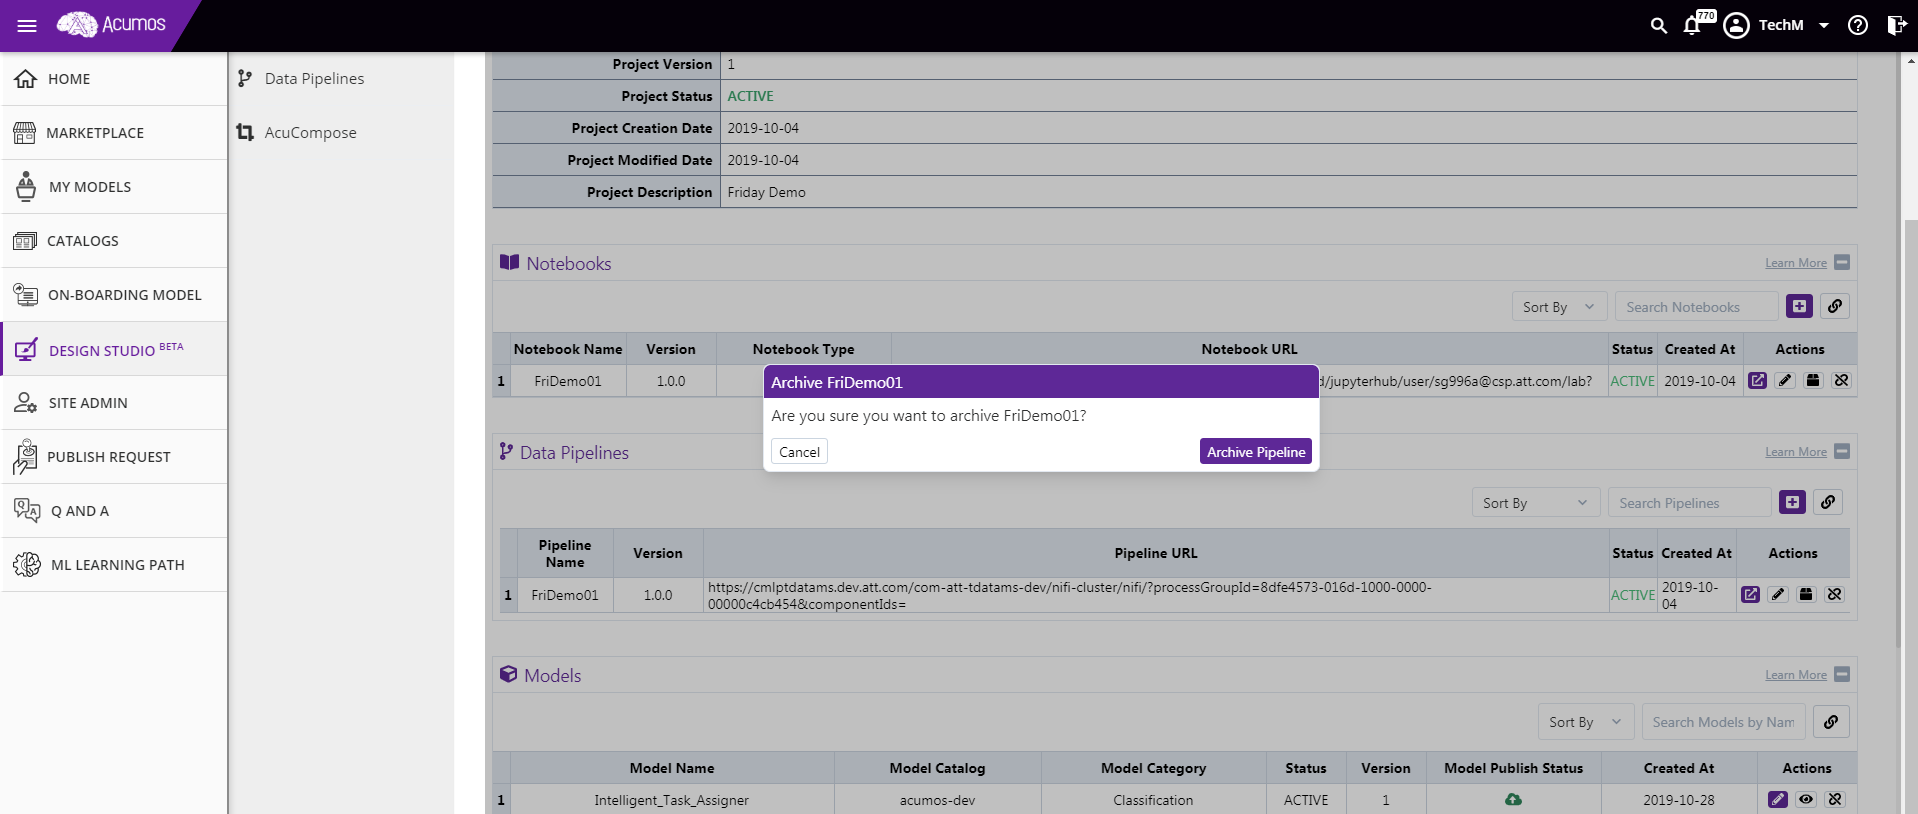
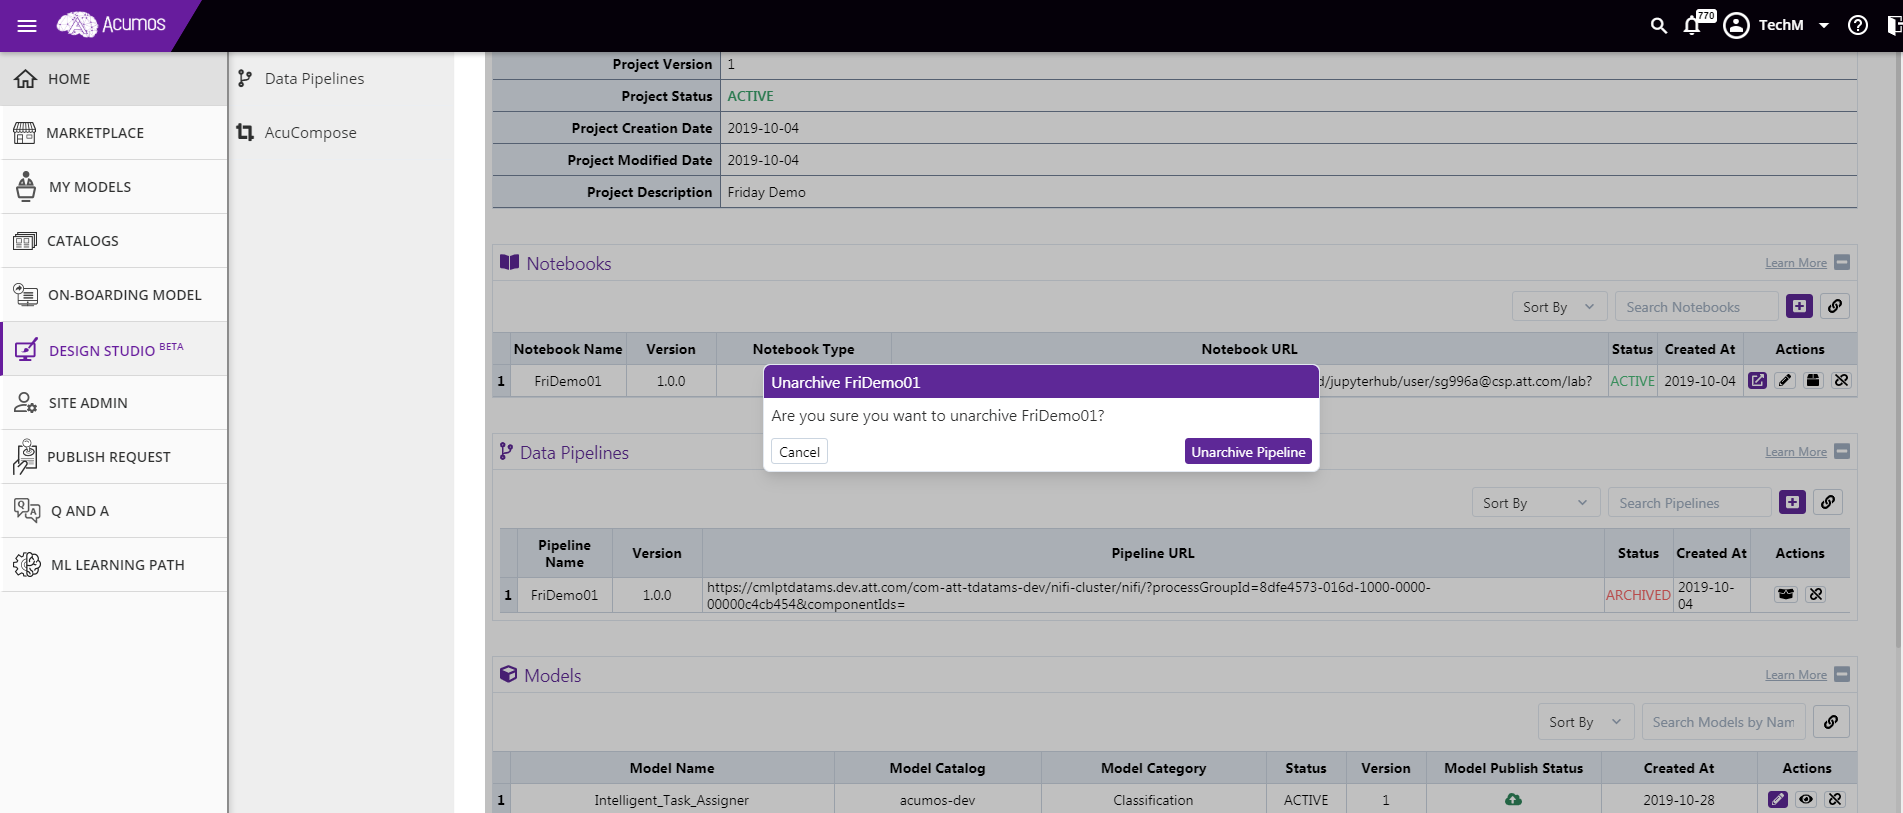
Archive/Unarchive Notebook:
User may choose an option of Archiving, Unarchiving a notebook by clicking on appropriate button. On confirmation, notebook will get archived/unarchived based on user action and status will get reflect into the Notebook list.
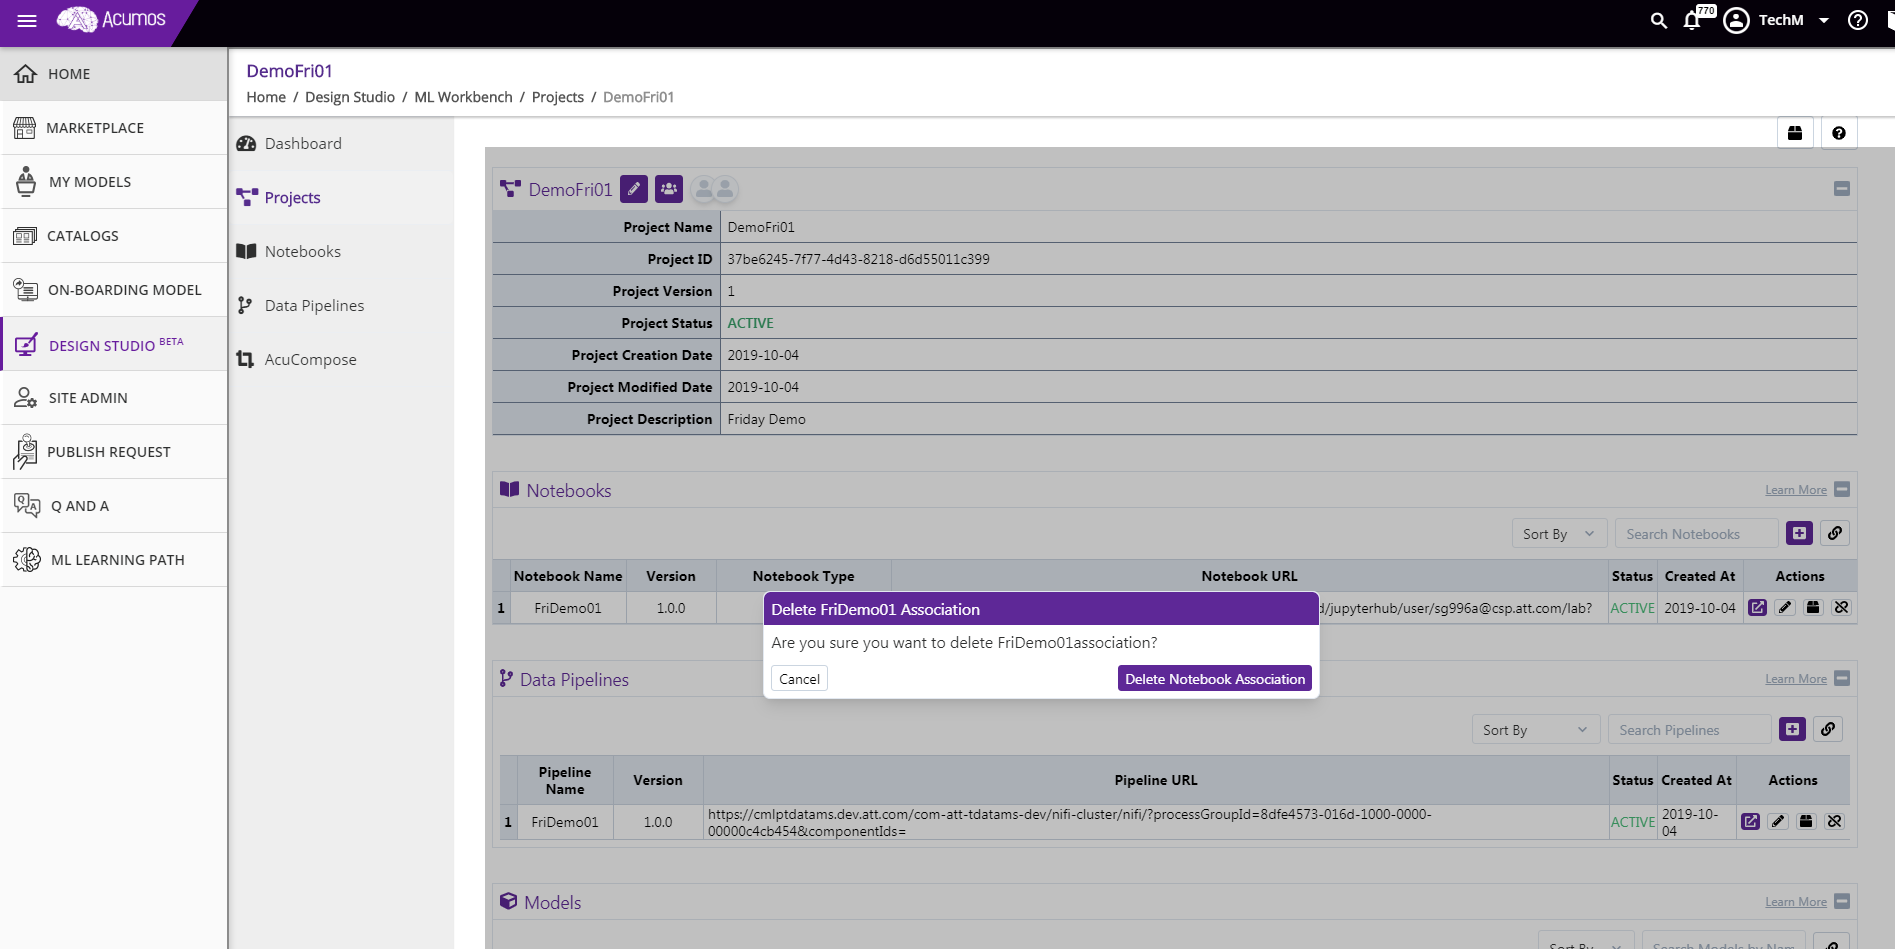
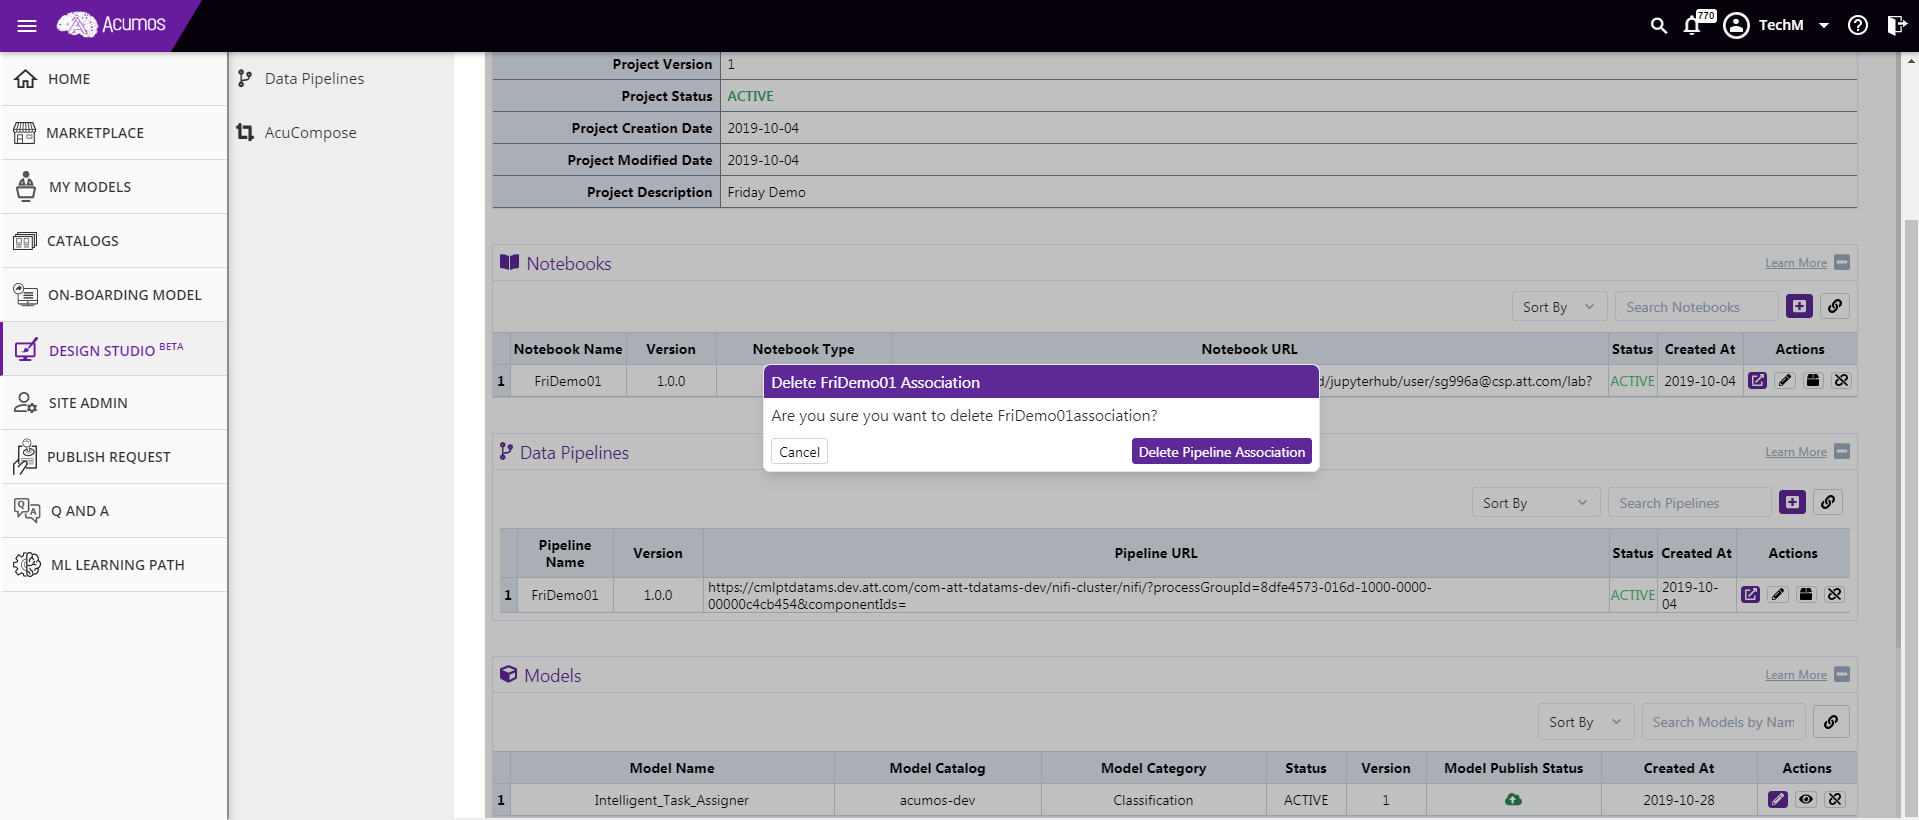
Delete Notebook Association:
User may choose an option to delete notebook association. On confirmation, notebook association with project will get deleted and notebook will not be seen under notebook list.
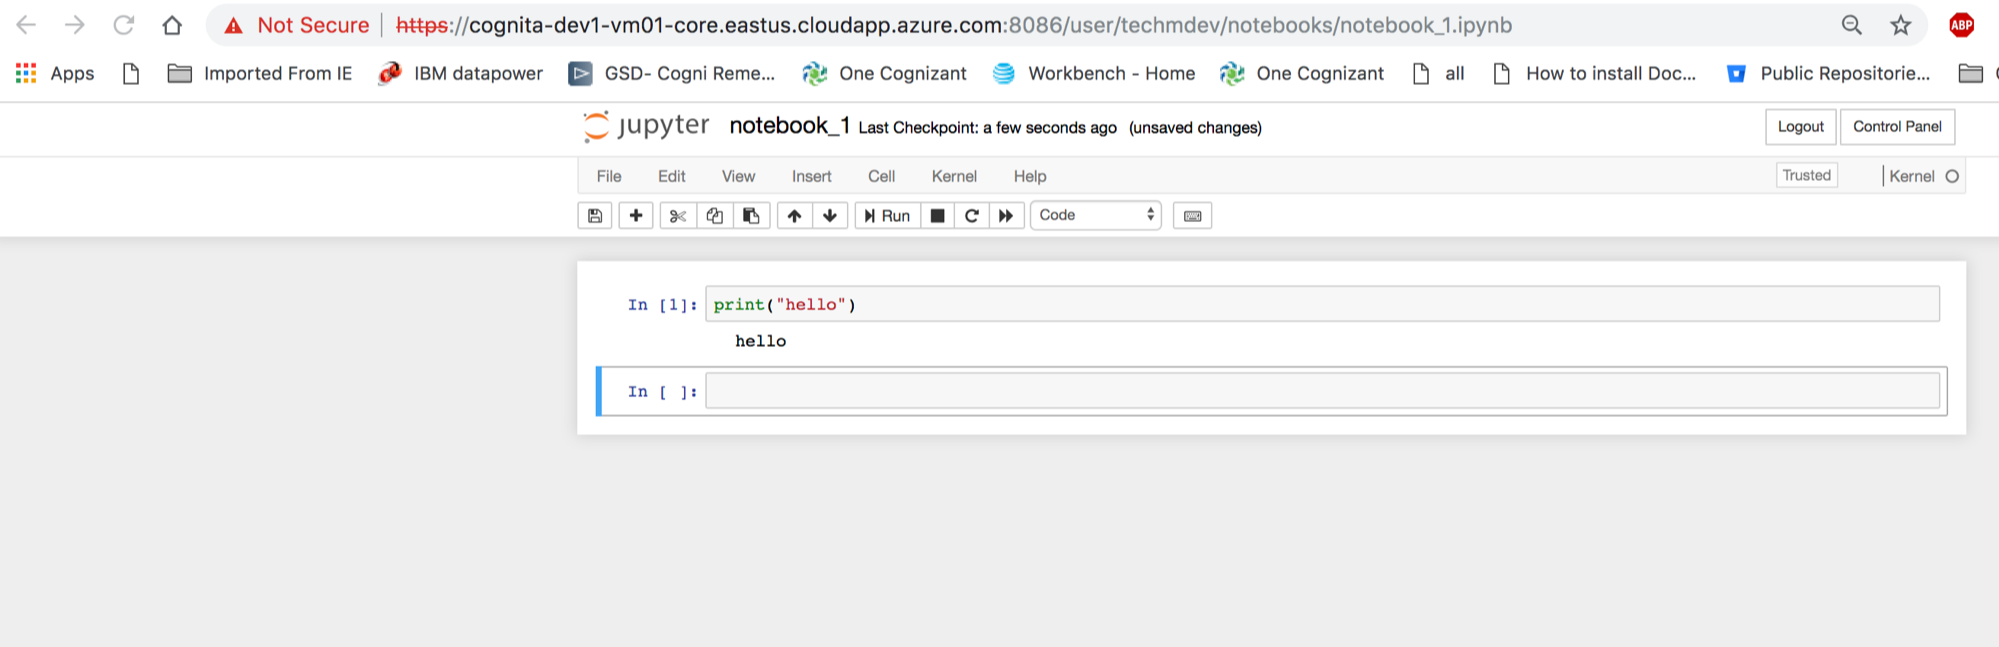
Launch Notebook
If user wish to Launch any Active Notebook, then user can click on the Launch button. On click of launch button, notebook will be opened in the user specific Jupyter Instance in a new browser tab.
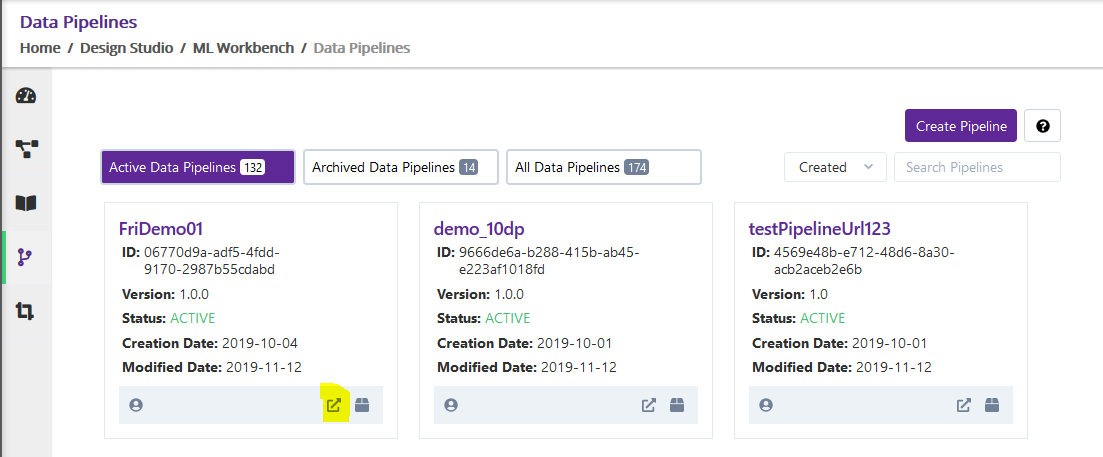
- Pipeline Section
Pipeline section will display all pipelines which are associate with the project. Pipeline lists will get displayed in tabular format showing Pipeline name, version, type, status, created date etc.
If there is no pipeline associated to that project then two options ‘Create Pipeline’ and ‘Associate Pipeline’ will be displayed to the user in this section.
Following are the user actions available in the Pipeline section:
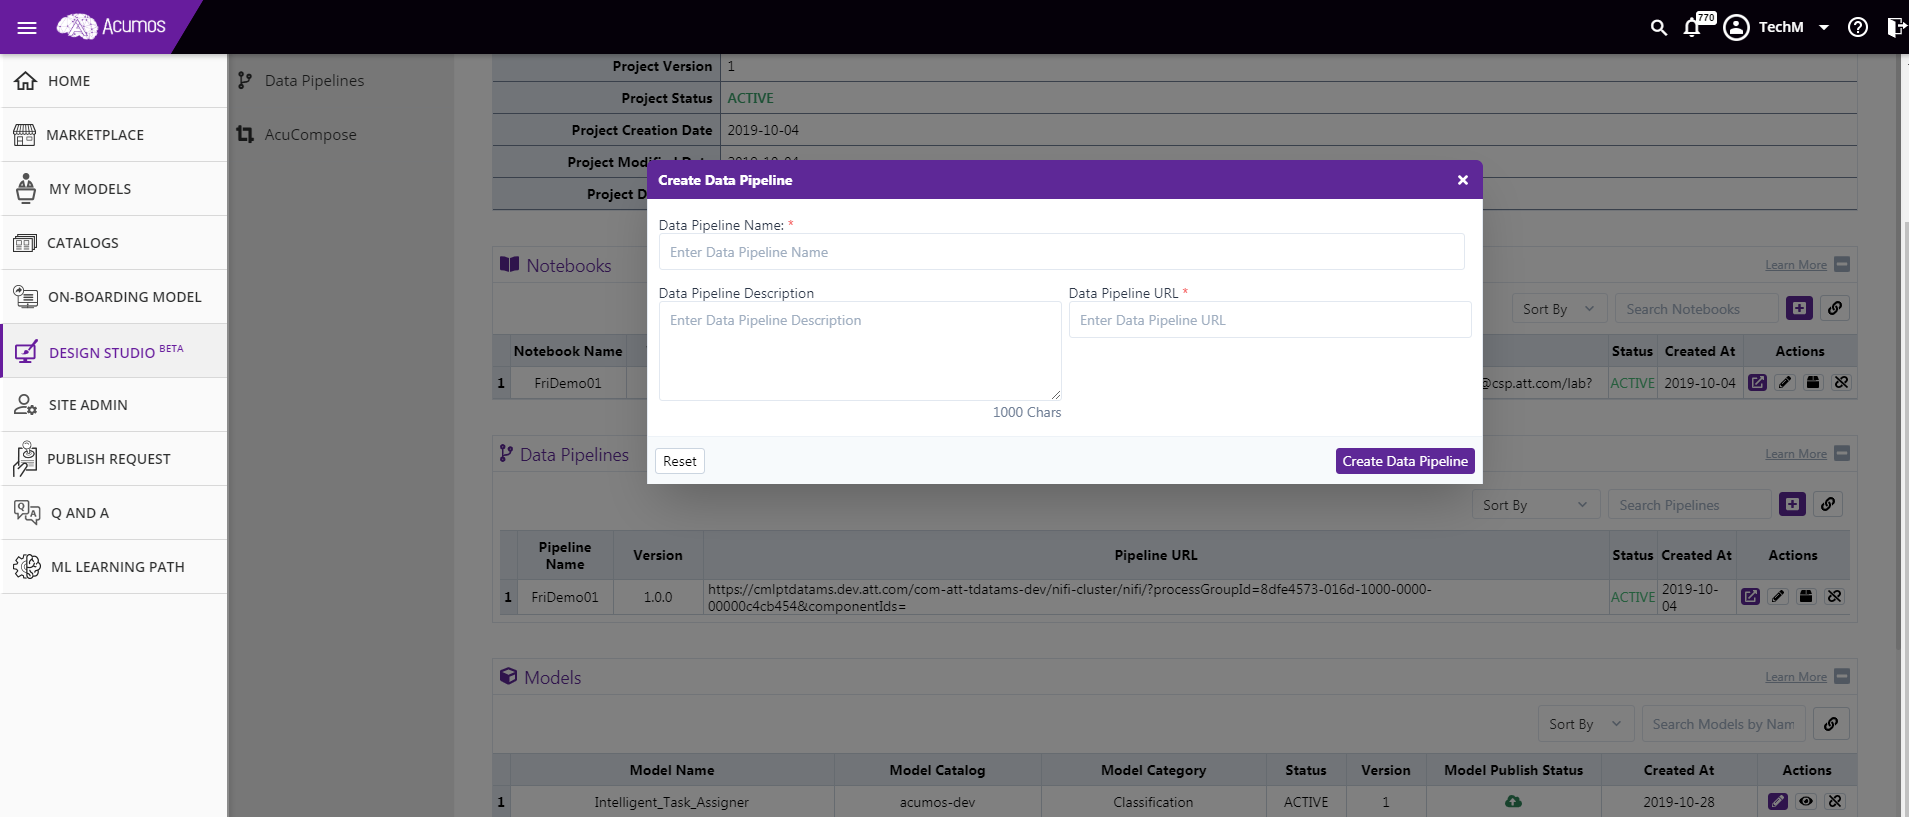
Create Pipeline:
If there is no pipeline associated already for a project then user can create a pipeline by clicking on the ‘Create Pipeline’ button. Or else, user has to click on the ‘+’ sign displayed on the right top corner of the Pipeline section for same. On click event, a dialog box will appeared where user has to fill out all required information and submit. On successful Pipeline creation, pipeline will get displayed in the tablular list.
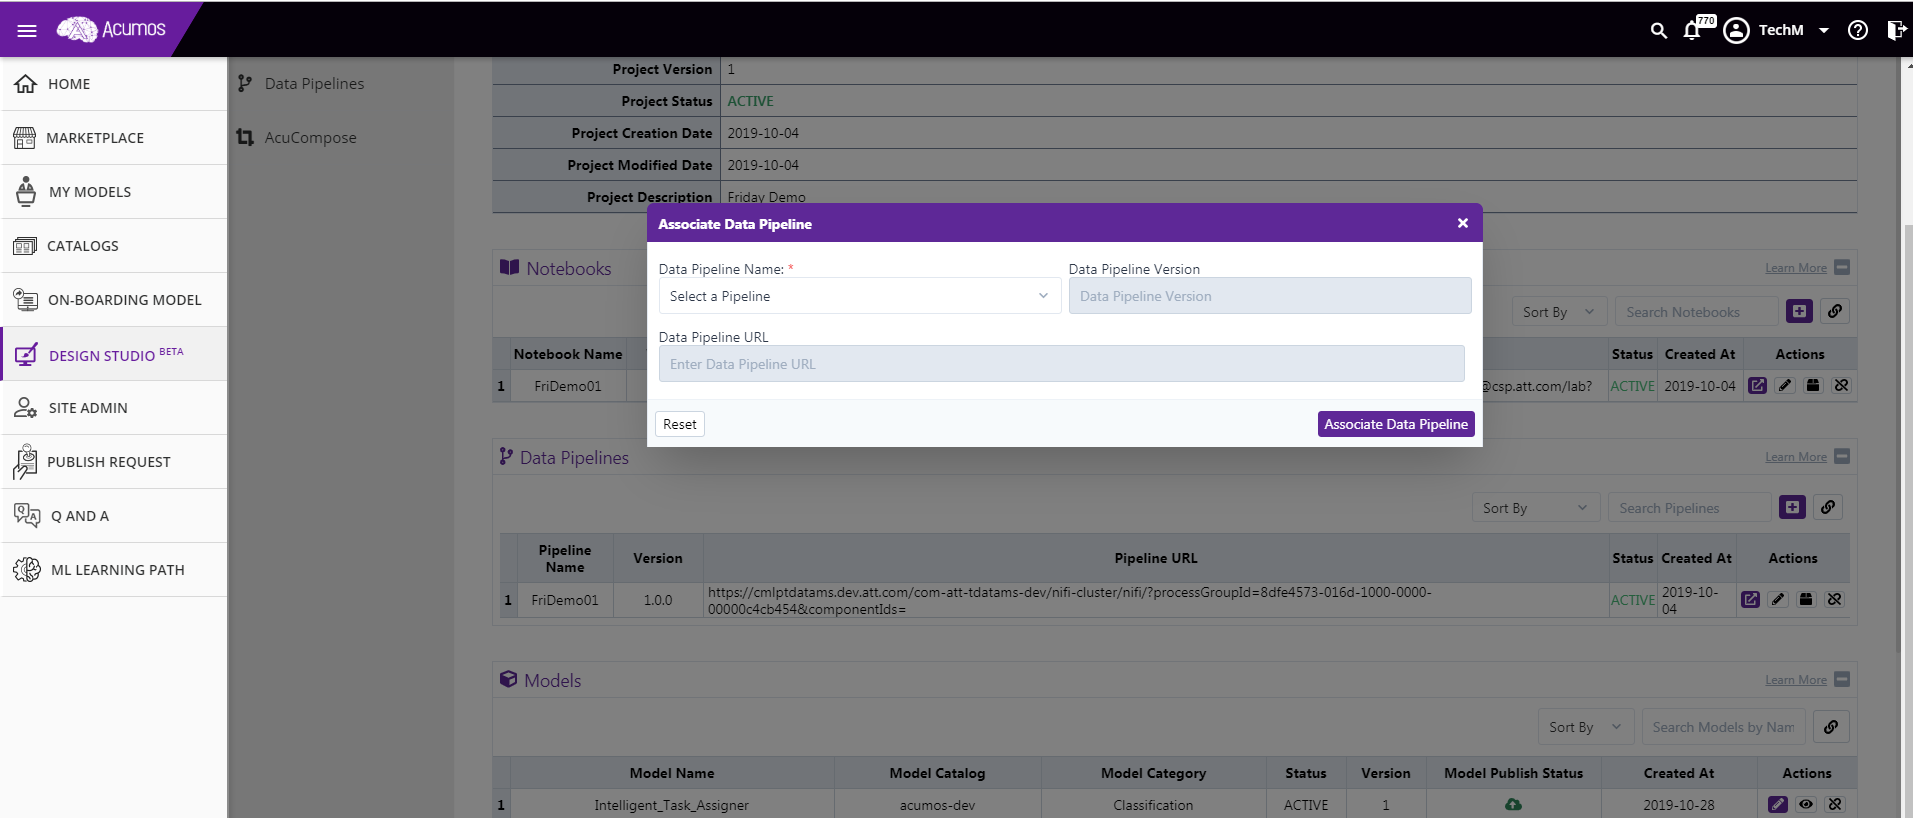
Associate Pipeline:
If there is no pipeline associated already for a project then user can associate an existing pipeline by clicking on the ‘Associate Pipeline’ button. Or else, user has to click on the link button displayed on the right top corner of the Pipeline section for same. On click event, a dialog box will appeared where user has to select the desired pipeline from drop down and submit. On successful Pipeline association, pipeline will get displayed in the tabular list.
Archive/Unarchive Pipeline:
User may choose an option of Archiving, Unarchiving a pipeline by clicking on appropriate button. On confirmation, pipeline will get archived/unarchived based on user action and status will get reflect into the Pipeline list.
Delete Pipeline Association:
User may choose an option to delete pipeline association. On confirmation, pipeline association with project will get deleted and pipeline will not be seen under pipeline list.
Launch Pipeline
If user wish to Launch any Active Pipeline, then user can click on the Launch button. On click of launch button, pipeline will be opened in the user specific Nifi Instance in a new browser tab.
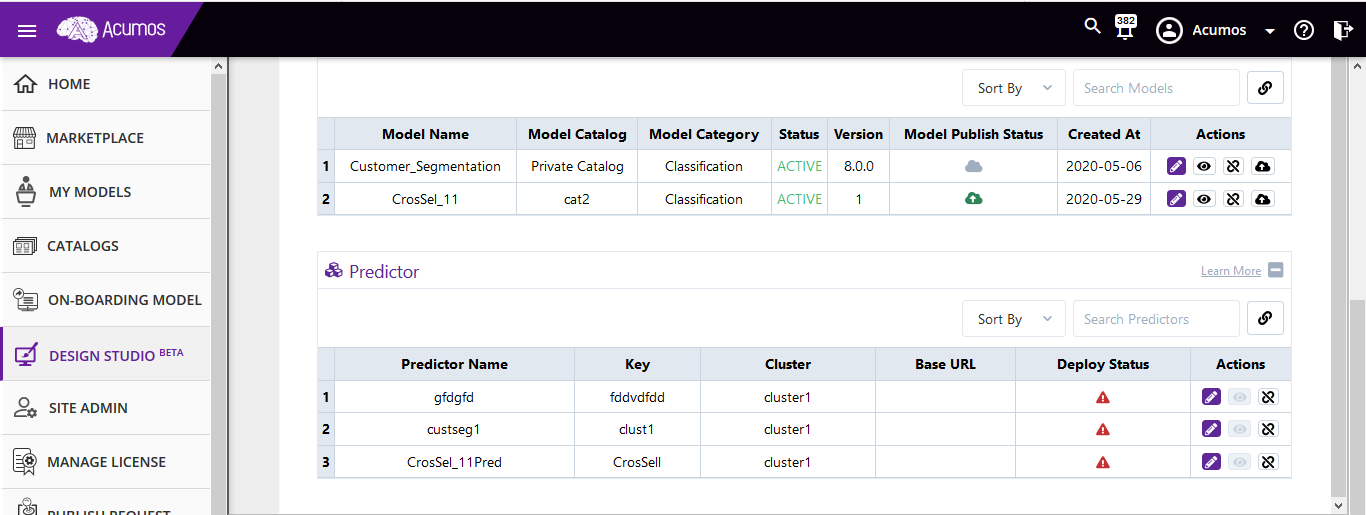
- Model Section
Model section will display all models which are associated with the project. Model lists will get displayed in tabular format showing model name, version, model type, status, created date etc.
If there is no model associated to that project then one option ‘Associate Model’ will be displayed to the user in this section.
Following are the user actions available in the Model section:
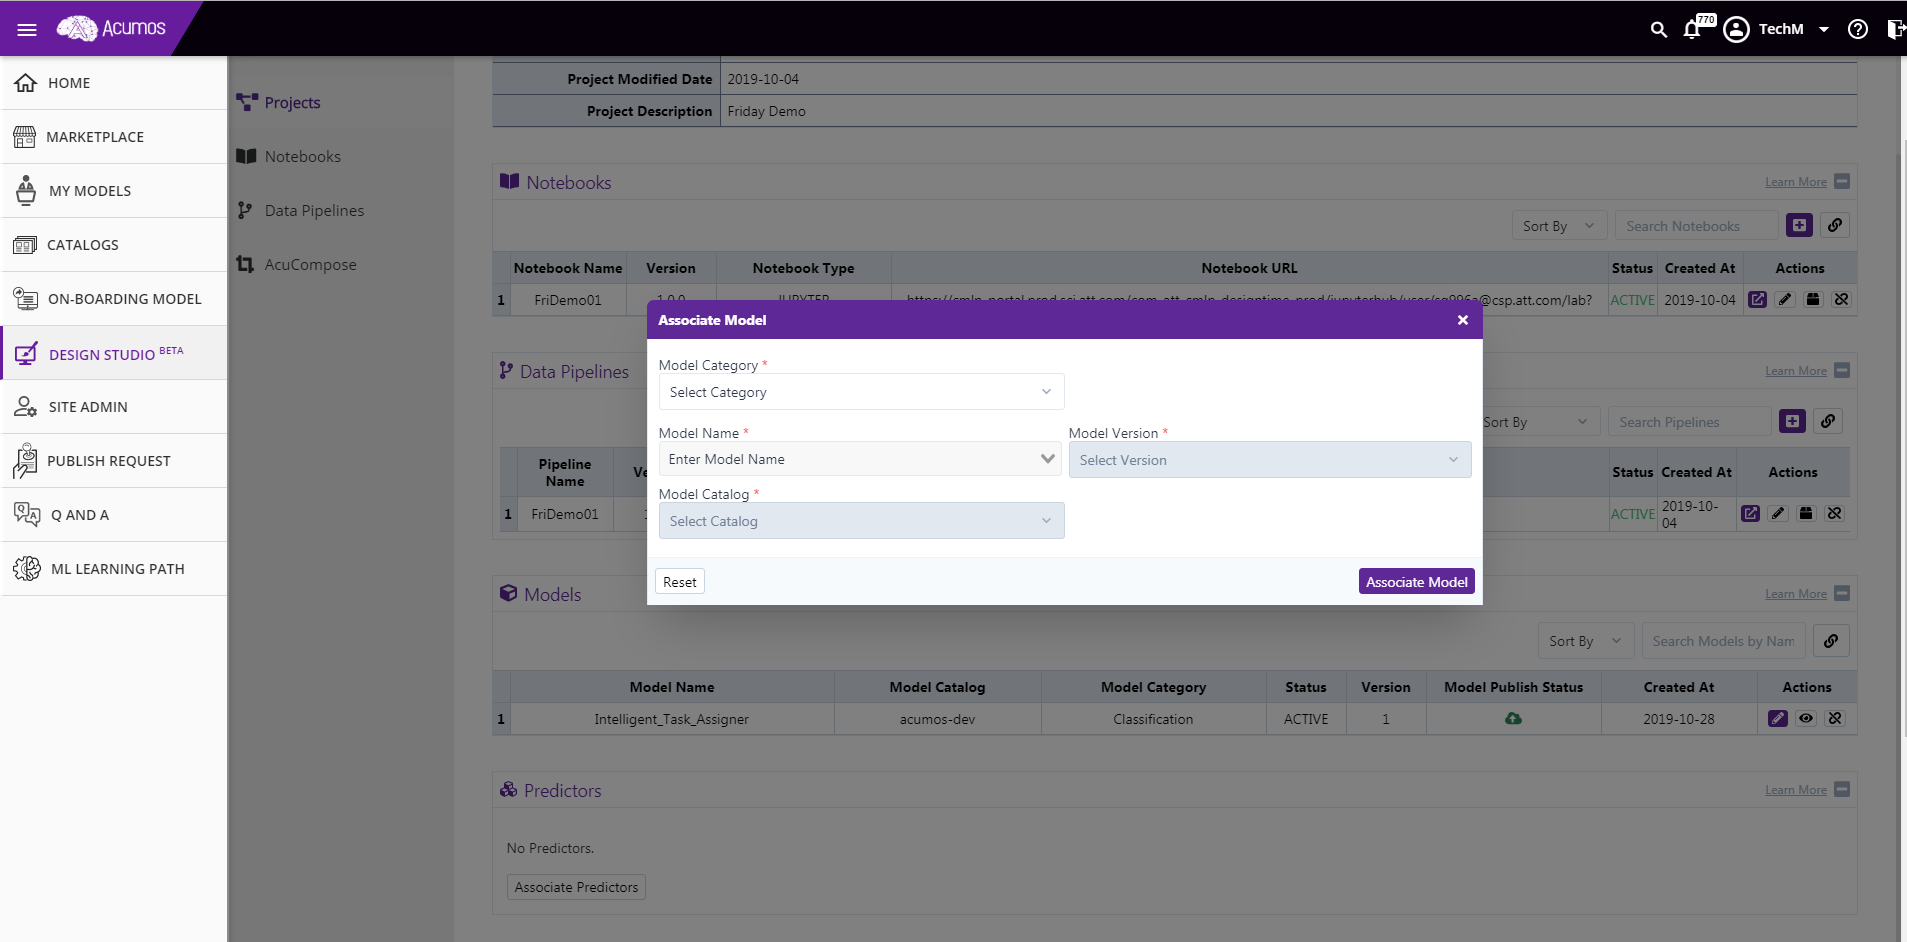
Associate Model:
If there is no model associated already for a project then user can associate an existing model by clicking on the ‘Associate model’ button. Or else, user has to click on the link button displayed on the right top corner of the model section for same. On click event, a dialog box will be appeared where user has to select the desired model from drop down and submit. On successful MODEL association, model will get displayed in the tablular list.
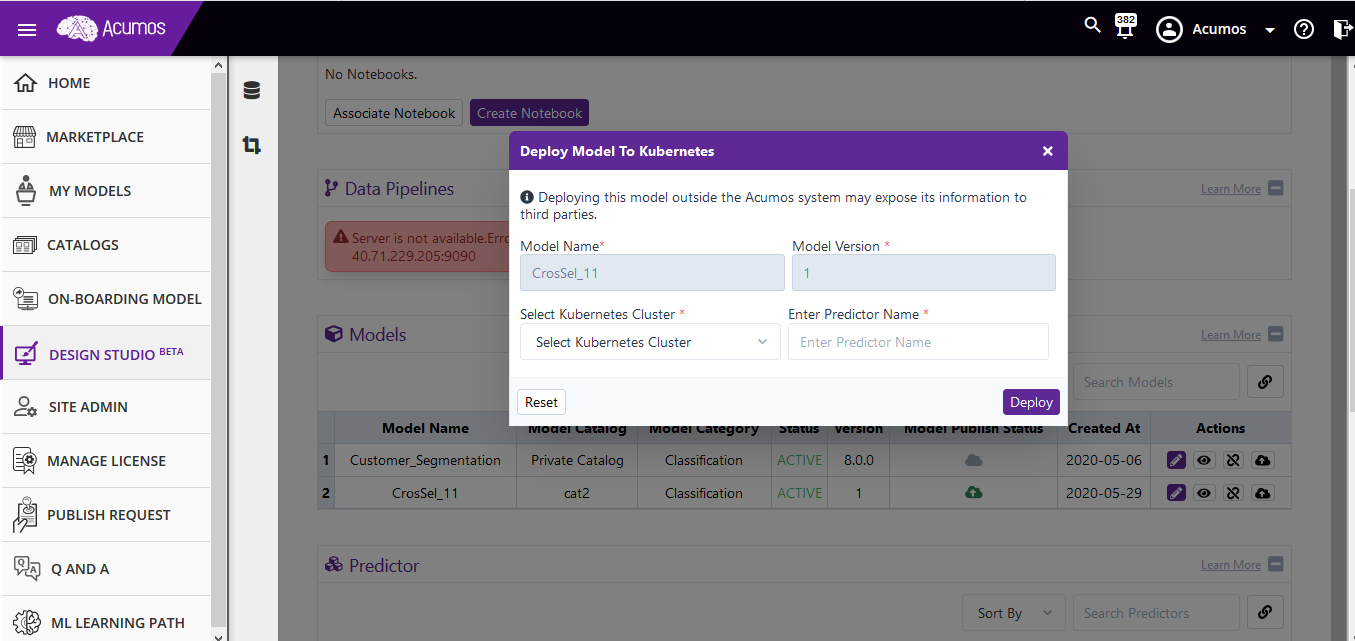
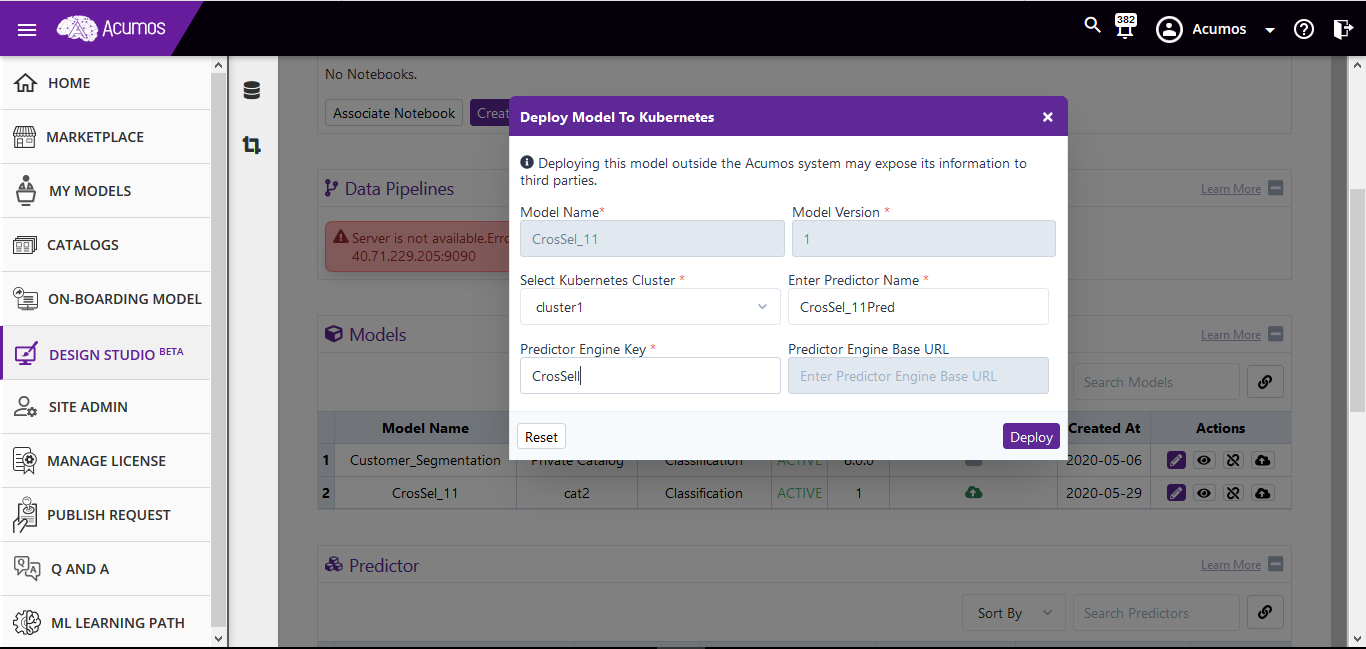
**Deploy to K8
After model association with project, user can deploy that model to k8s, the predictor will be created with user provided values and it will be displayed under the predictor section.
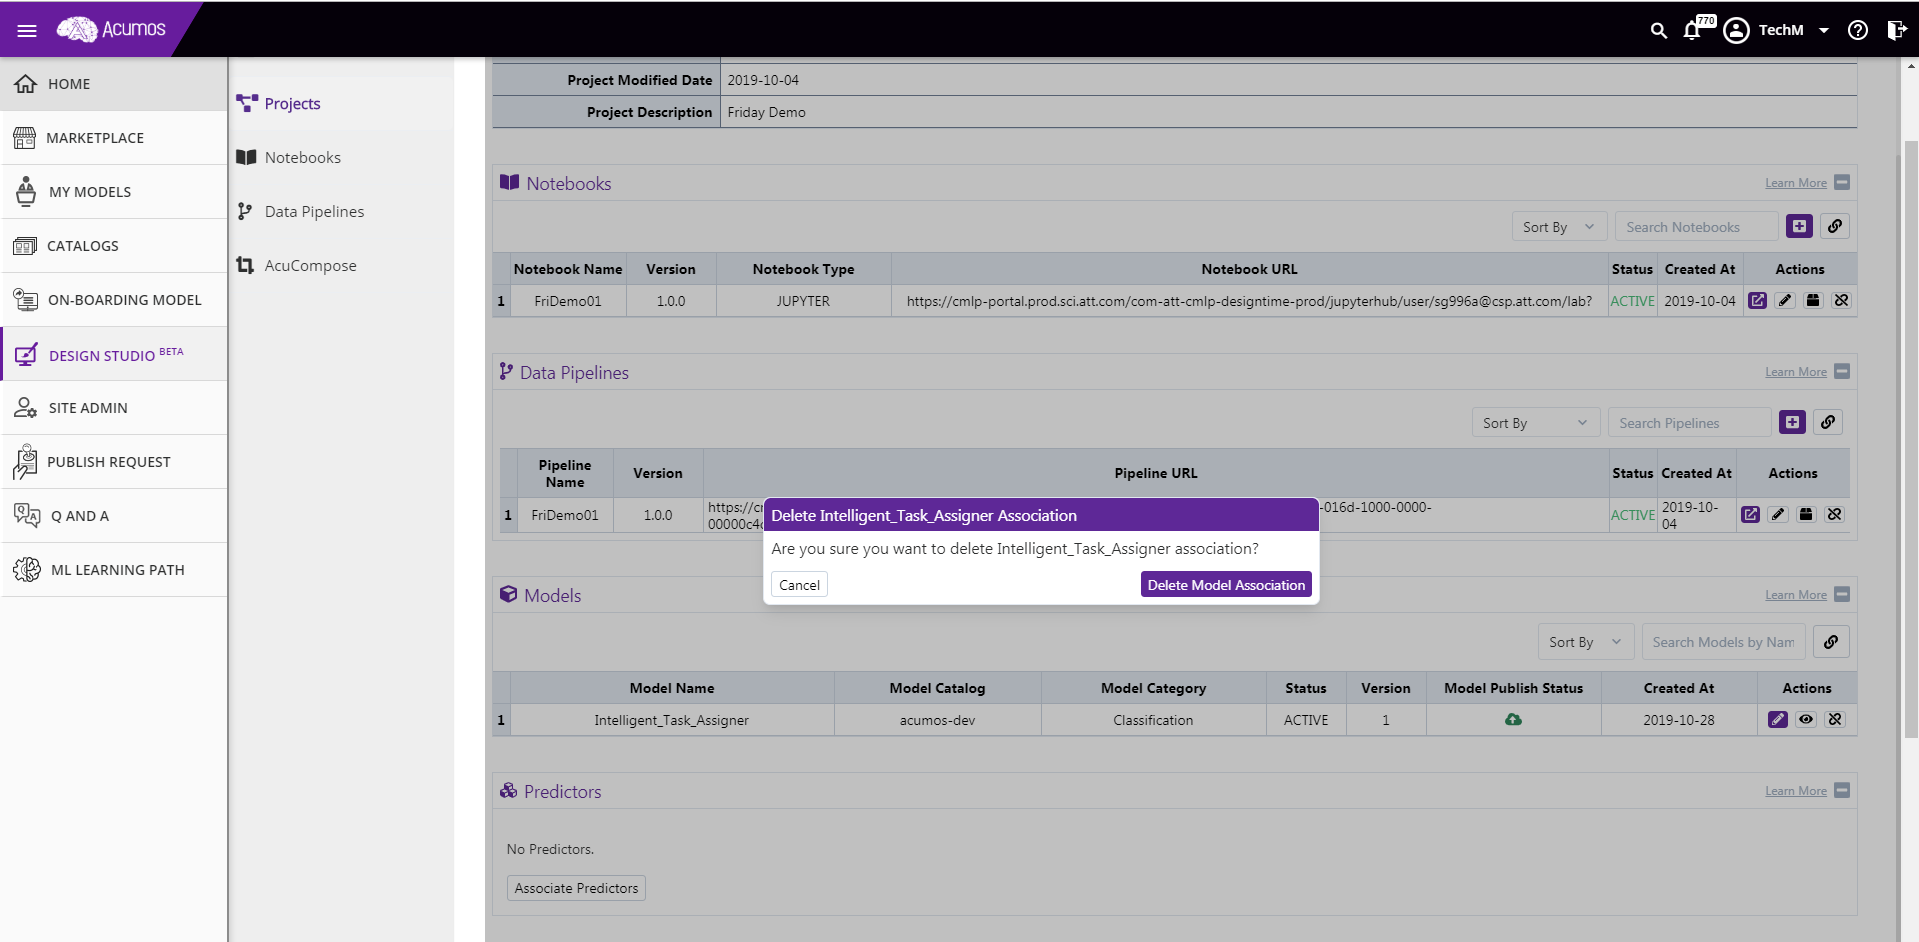
Delete Model Association:
User may choose an option to delete model association. On confirmation, model association with project will get deleted and model will not be seen under model list.
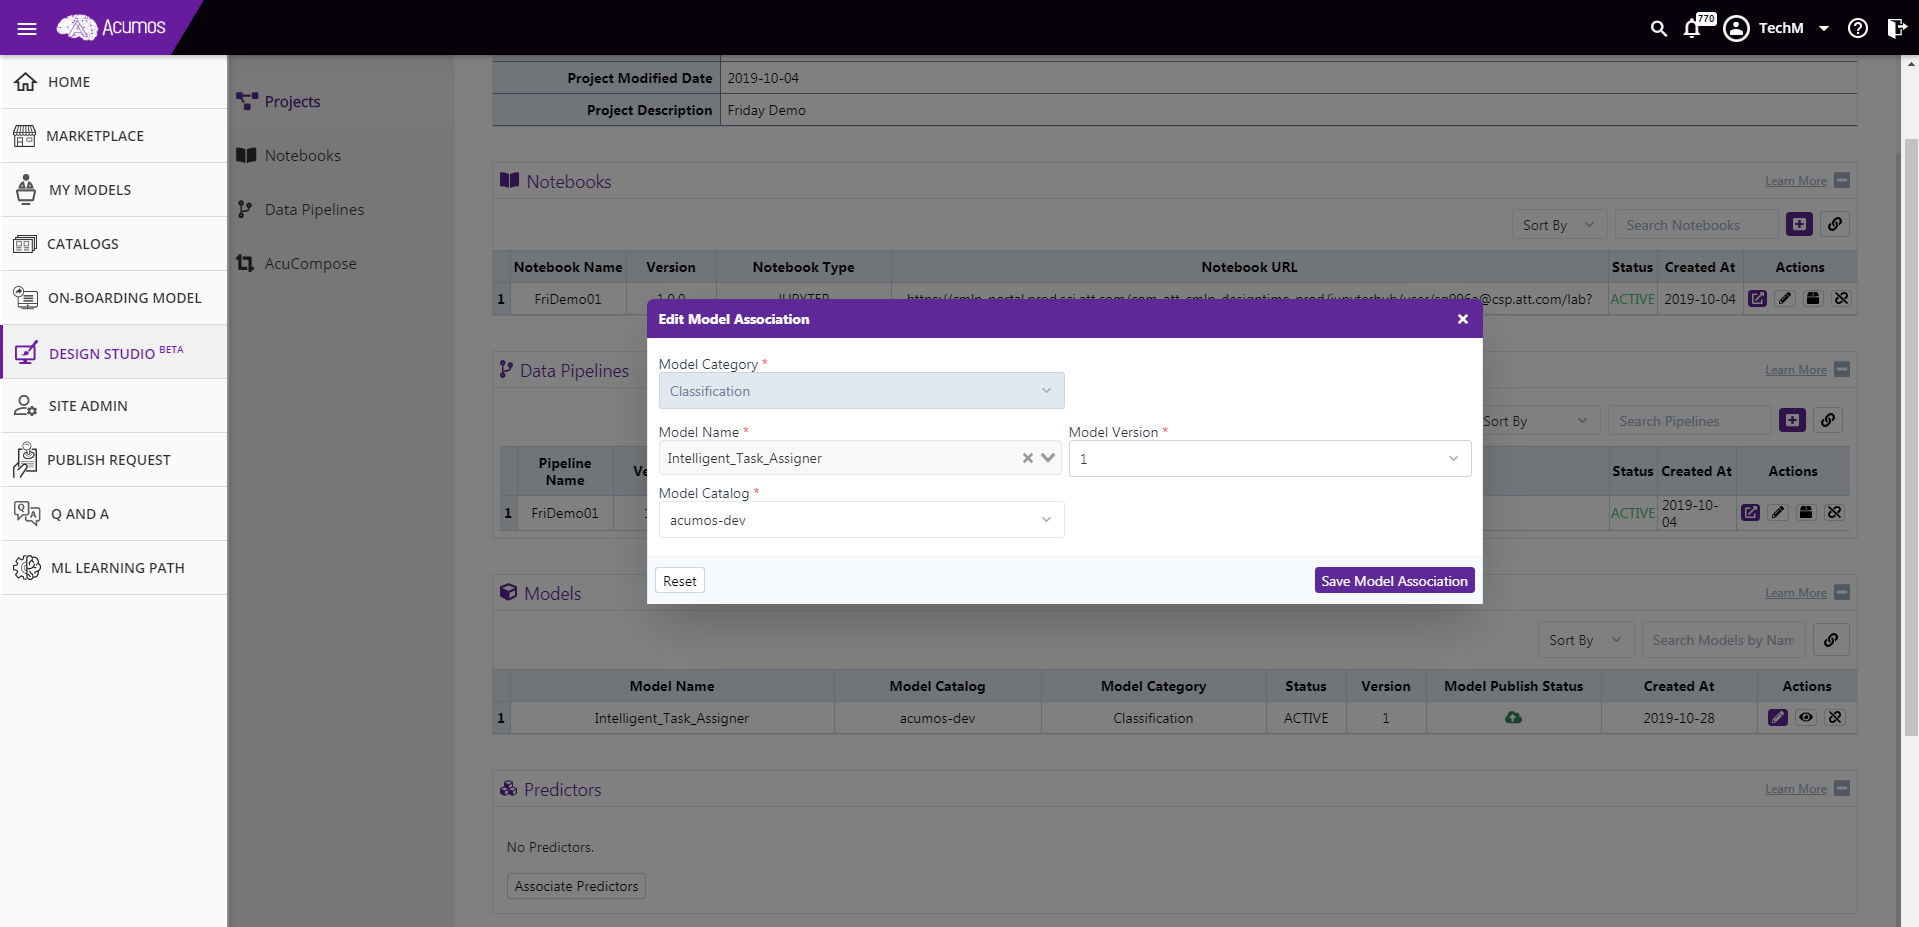
edit Model Association
User may choose to edit model association. On click of the appropriate button, a dialog box will be appeared where user can select other version of the model to update model association.
View Model
User can view additional details about the associated model by clicking on view model button. When clicked, user will be redirected to model details page of the marketplace.

- Predictor Section
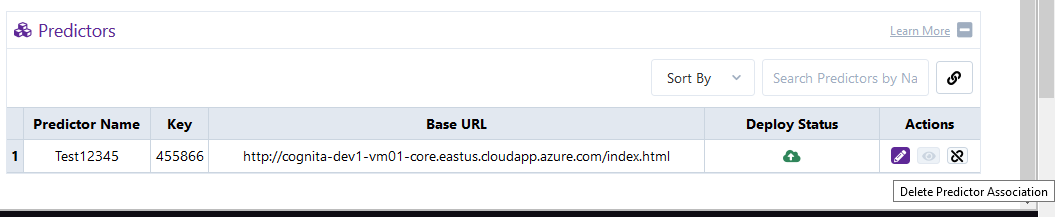
Predictor section will display all predictorss which are associated with the project. Predictor lists will get displayed in tabular format showing predictor name, version, predictor type, status, created date etc.
If there is no predictor associated to that project then one option ‘Associate Predictor’ will be displayed to the user in this section.
Following are the user actions available in the Predictor section:
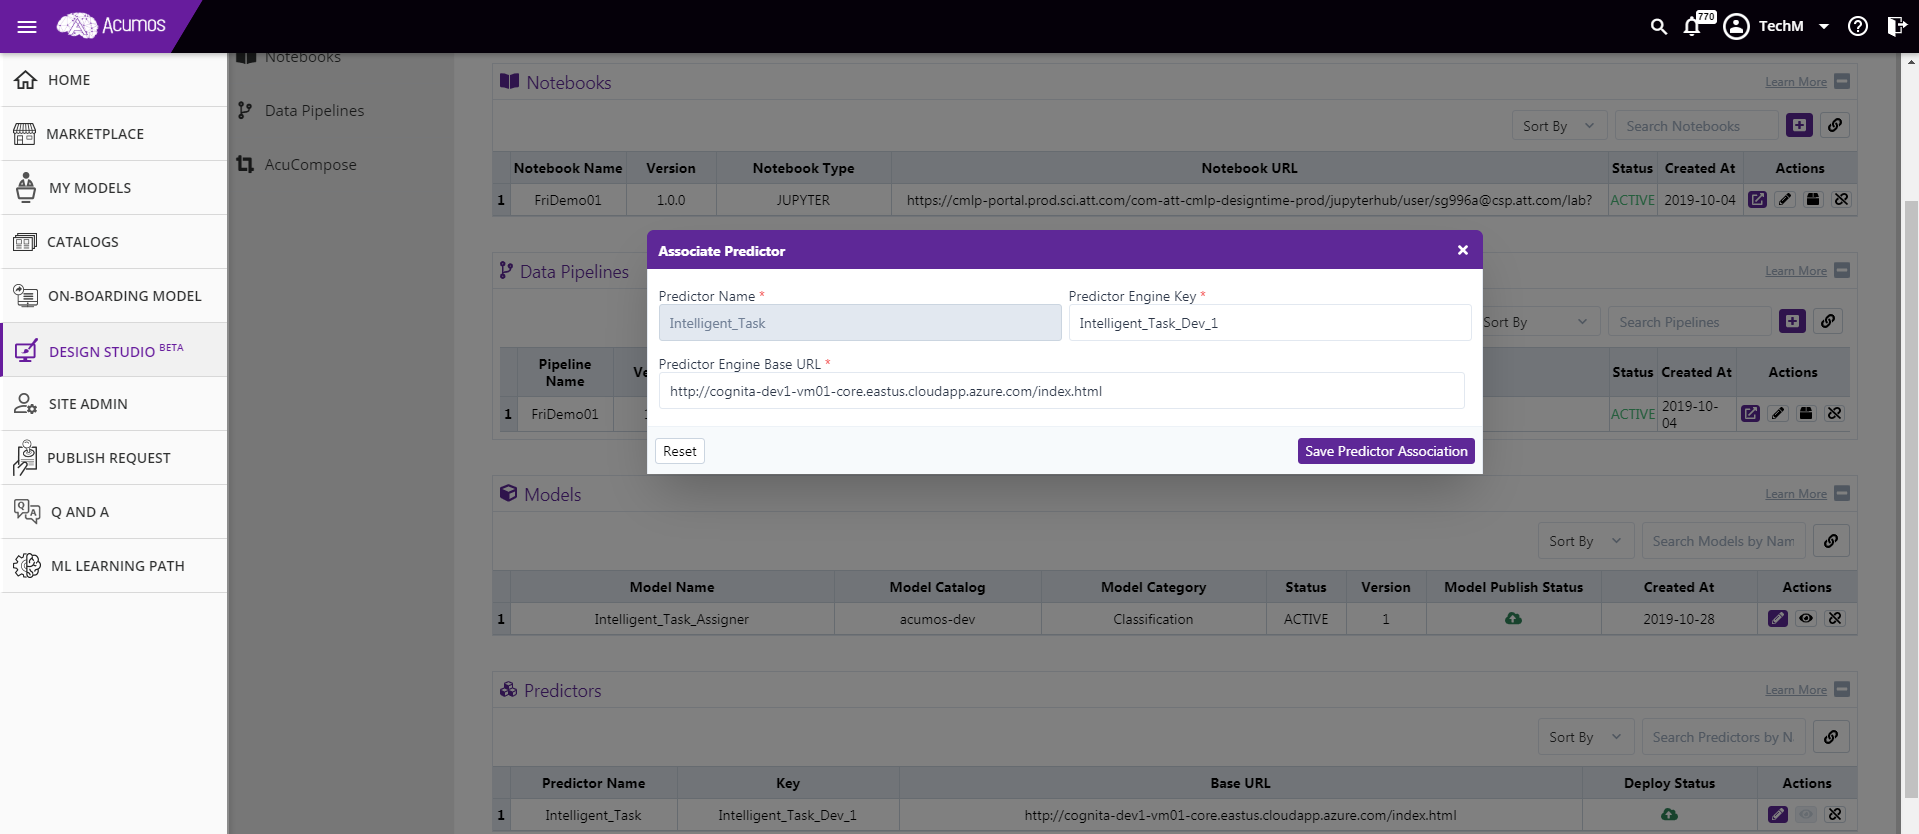
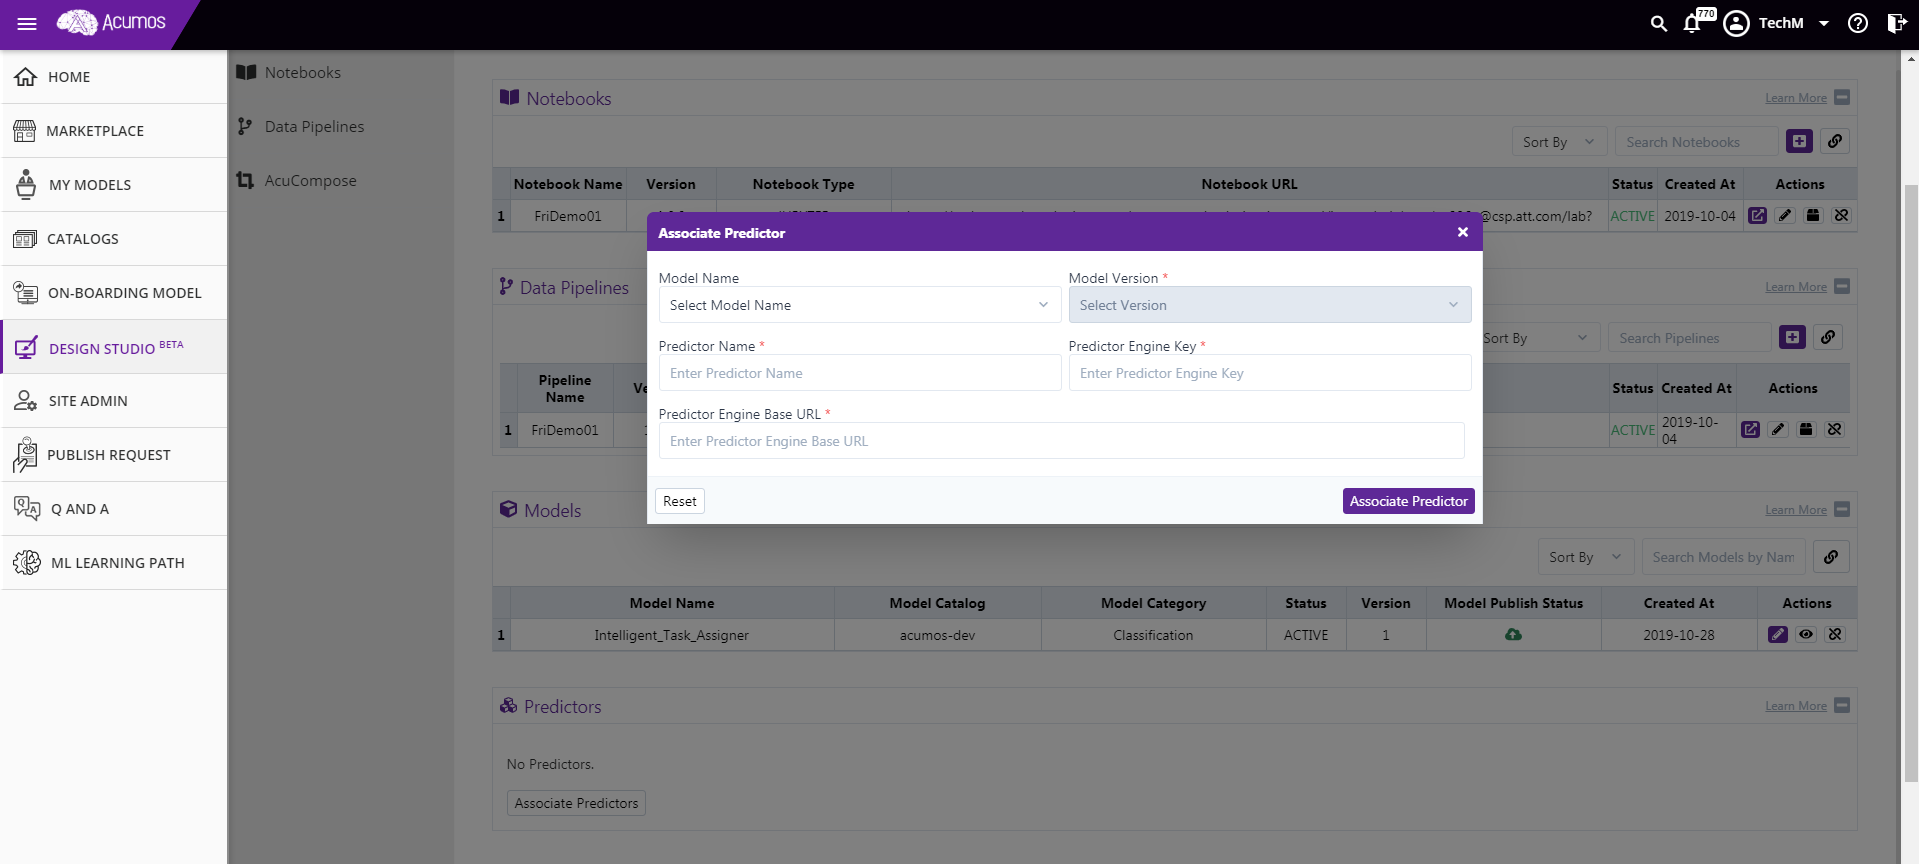
Associate Predictor:
If there is no predictor associated already for a project then user can associate an existing predictor by clicking on the ‘Associate predictor’ button. Or else, user has to click on the link button displayed on the right top corner of the predictor section for same. On click event, a dialog box will be appeared where user has to select the desired predictor from drop down and submit. On successful MODEL association, predictor will get displayed in the tablular list.
Delete Predictor Association:
User may choose an option to delete predictor association. On confirmation, predictor association with project will get deleted and predictor will not be seen under predictor list.
edit Predictor Association
User may choose to edit predictor association. On click of the appropriate button, a dialog box will be appeared where user can select other version of the predictor to update predictor association.