On-Boarding a Model Using the Portal UI
A high-level summary of the on-boarding steps and overview of the workflow is shown below:
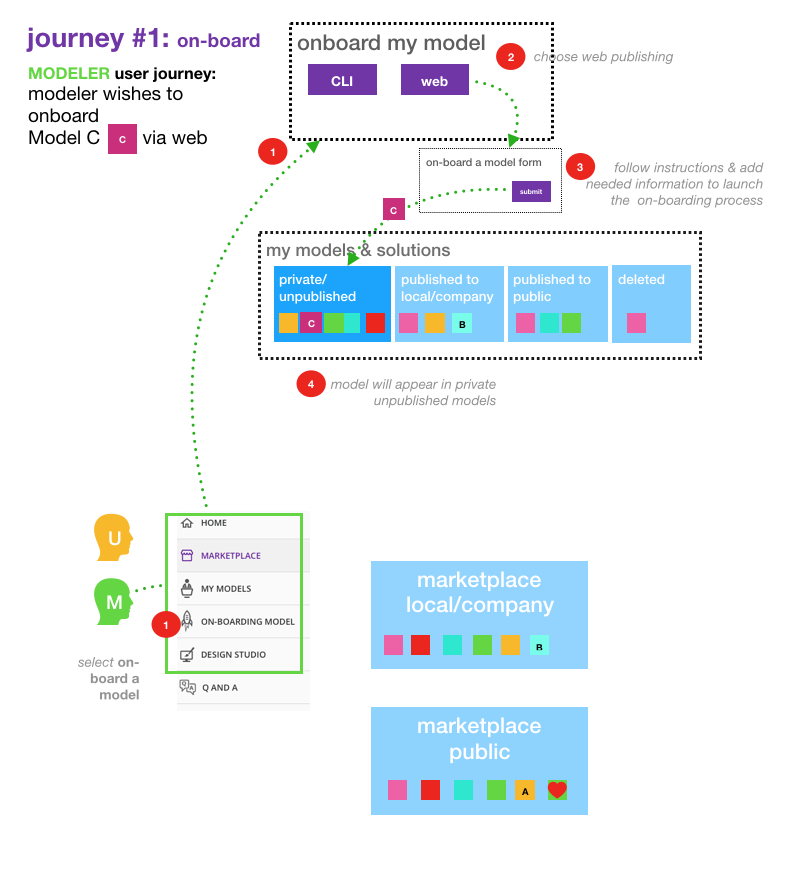
Prerequisites : You have to create a model bundle in your own environment before start to on-board. Acumos cannot transform your model in a microservice with only the model itself, it needs some other relevant information contained in the model bundle. The model bundle consists of component.json defining the component and its metadata and component.proto with the protobuf specs. You can retrieve all the information to create your model bundle in the “ON-BOARDING BY WEB” home page
Once your model bundle has been created, follow these steps:
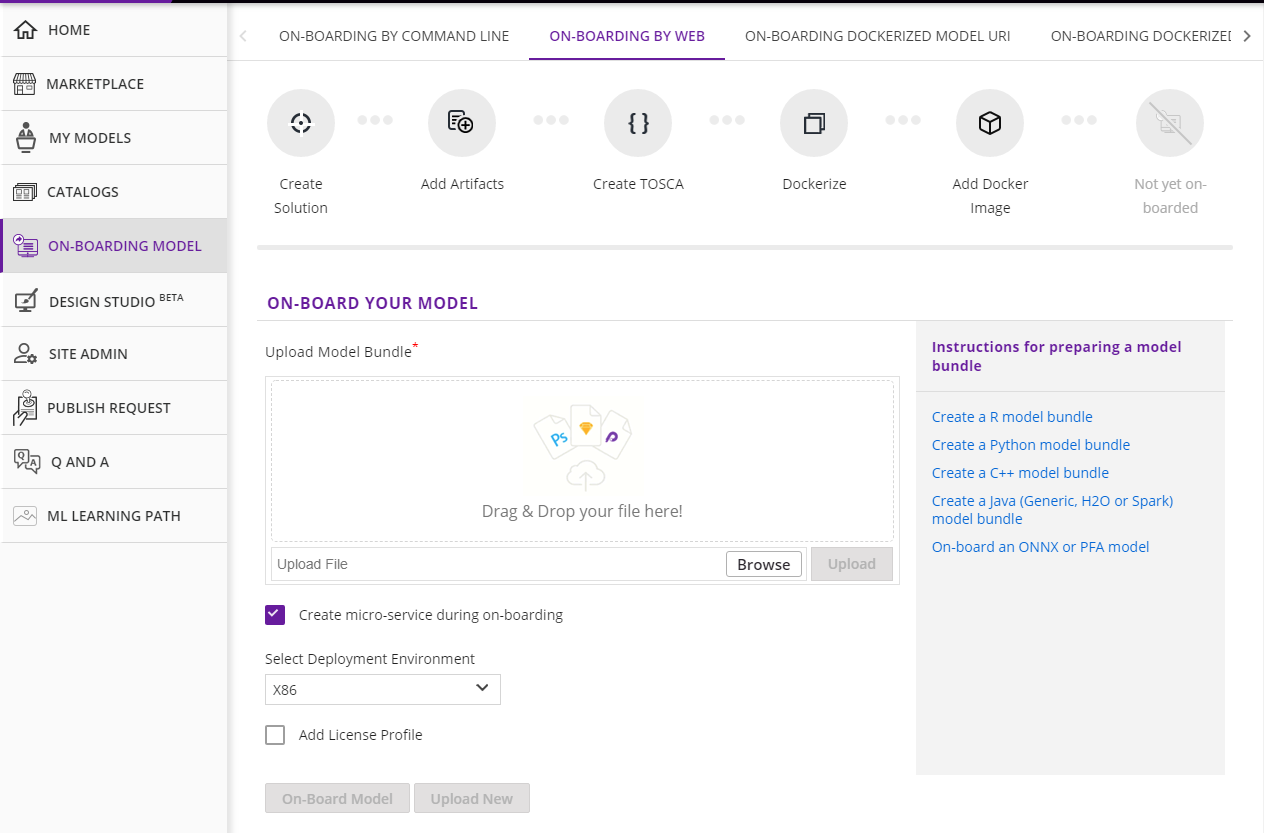
Select the “ON-BOARDING MODEL” tab in the outer left menu
Select “ON-BOARDING BY WEB”
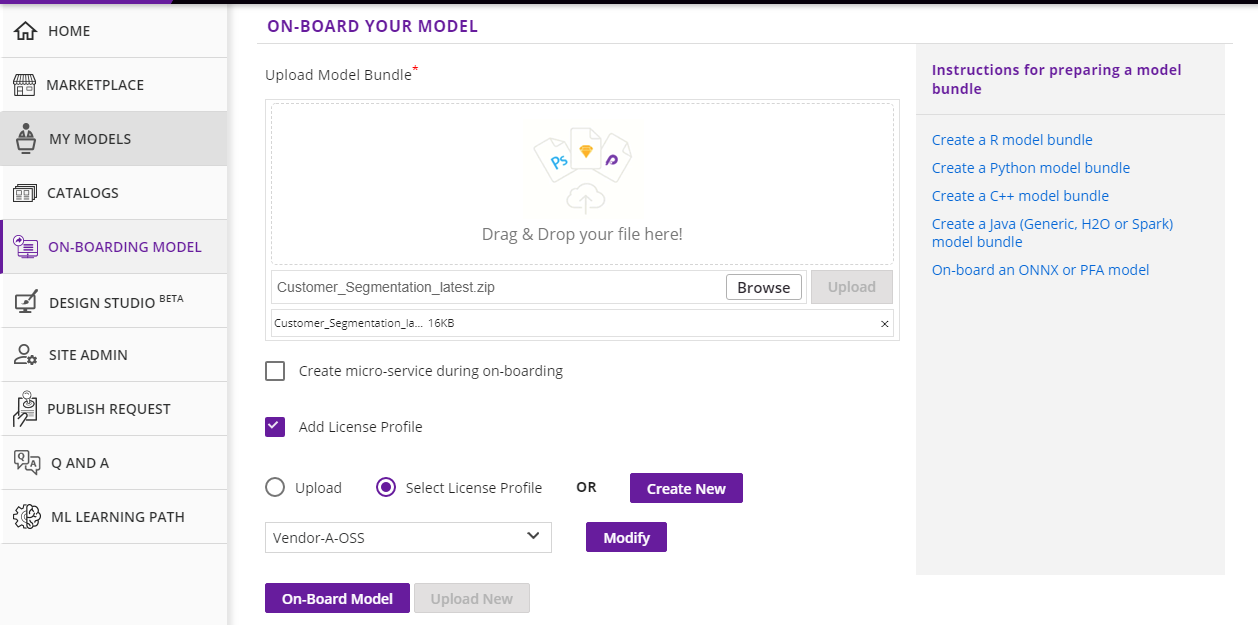
Drag & Drop your model bundle or use the Browse button to select it
Click Upload
When uploading is finished, click on On-Board Model.

This will initiate a series of back-end process steps, illuminated as they run, by the cascade from left to right of the icons on the top of the page. These include creating the microservice that will run in a docker container, creating a TOSCA file for your model so it can be used in the Design Studio, and storing the artifacts and model.
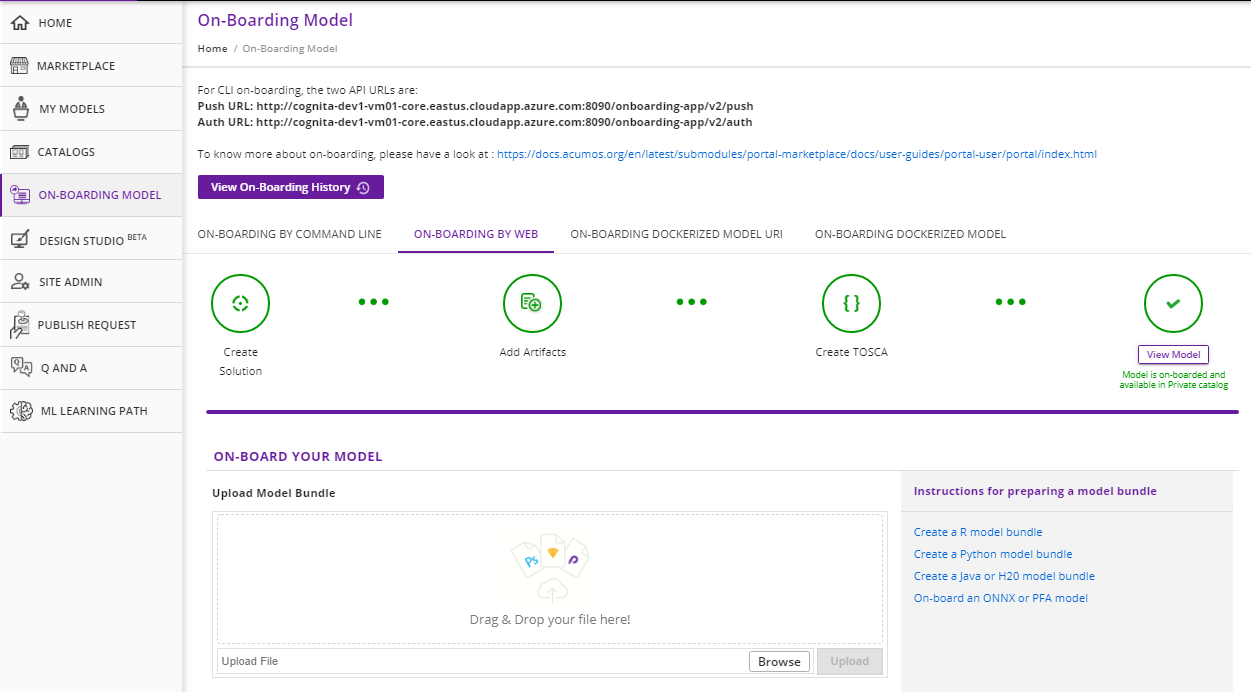
On-boarding is finished when all steps turn green. Click the View Model button to see your model in the MY UNPUBLISHED MODELS section of the My Models page.
If one of the steps appears in red, on-boarding has failed. Check your notifications to determine why on-boarding failed - there should be a message with a link to download on-boarding log files. If you need help debugging, please reach out to the Acumos Community or Dev Discuss mailing lists or post on StackOverflow.
The above On-boarding process is along with microservice generation. If you dont want MicroService Generation you can uncheck Create micro-service during on-boarding checkbox which is checked by default.
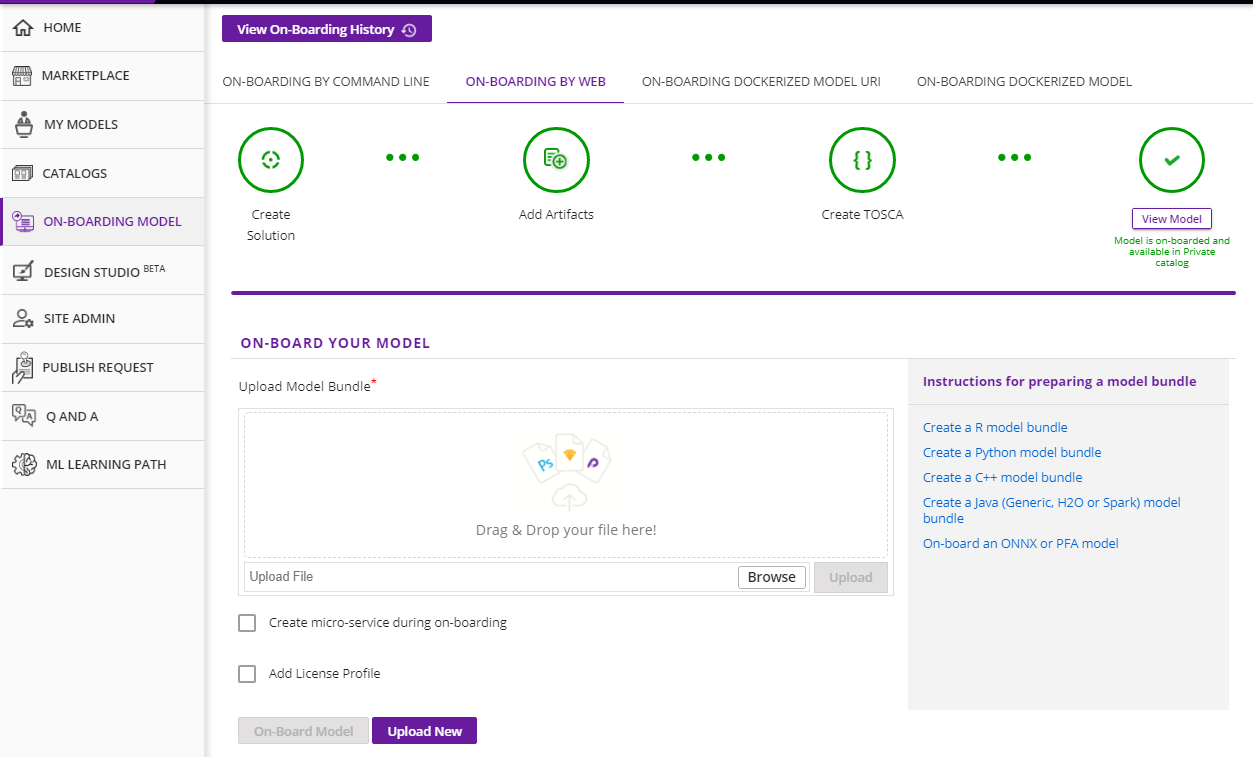
The above process will skip the steps Dockerize and Add Docker Image when we uncheck Create micro-service during on-boarding. You can see the Create Solution, Add Artifacts and Create Tosca steps turn green. Click the View Model button to see your model in the MY UNPUBLISHED MODELS section of the My Models page. You can see Create Microservice button which is right side of ** Manage My Model** button to create MicroService for your model.
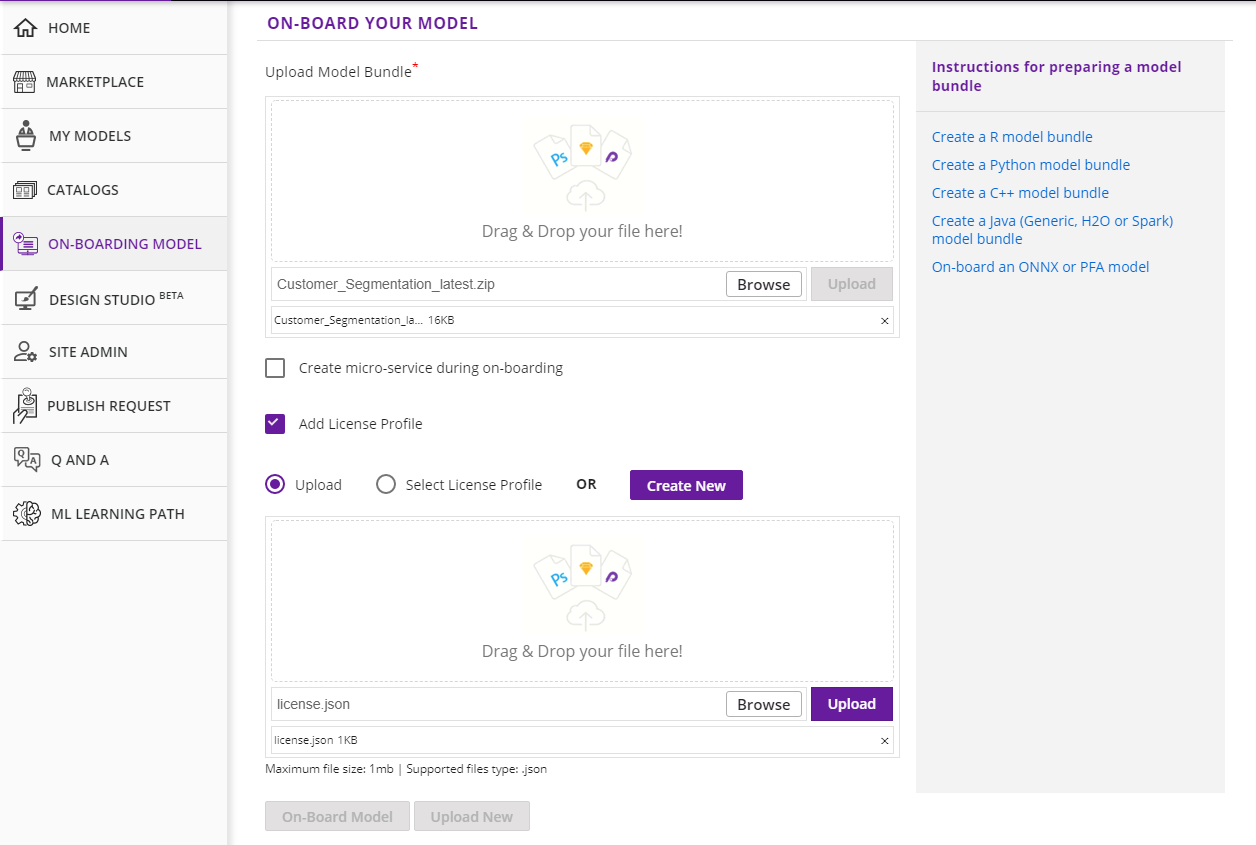
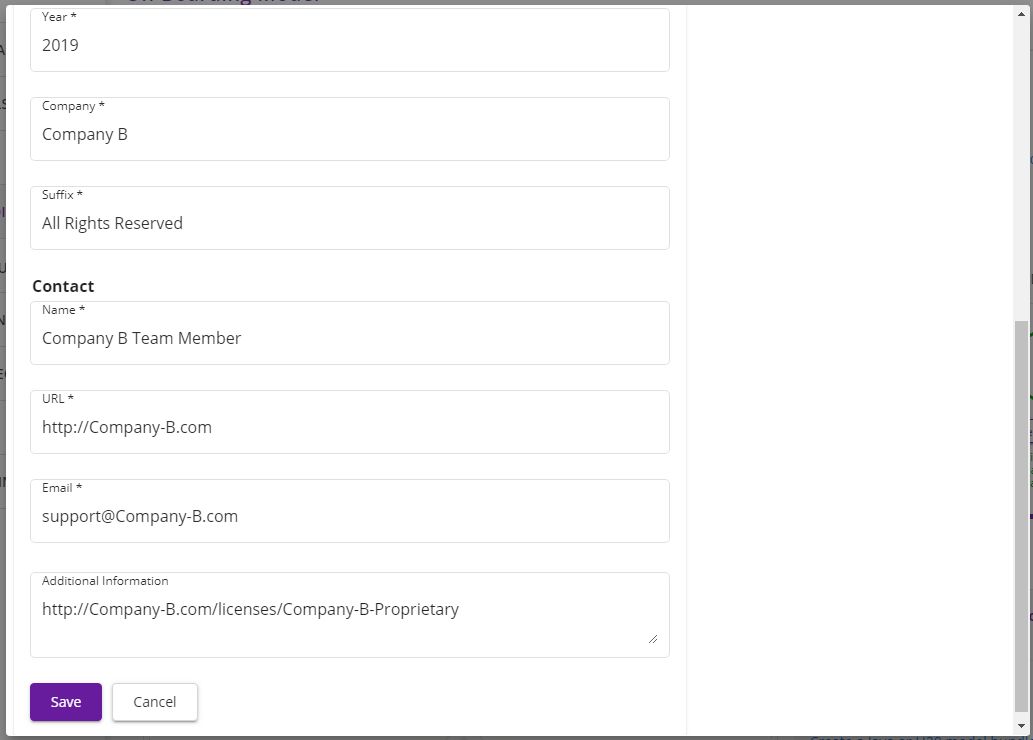
License can be added optionally. Add License Profile check box allows the user to add license file while On-boarding the model. There are two radio buttons Upload and Select License Profile from where user can upload license file which must be with an extension of .json which contains high level general terms and conditions for use of the model. Checkbox will be disabled till the model is uploaded.
If Upload radio button is selected it will allow user to browse a license.json file. Once the file is selected the Upload button is enabled clicking which file will be uploaded.
Select License Profile radio button allows the user to select a license template from a drop-down list. The Modify button allows the user to change the content of template.
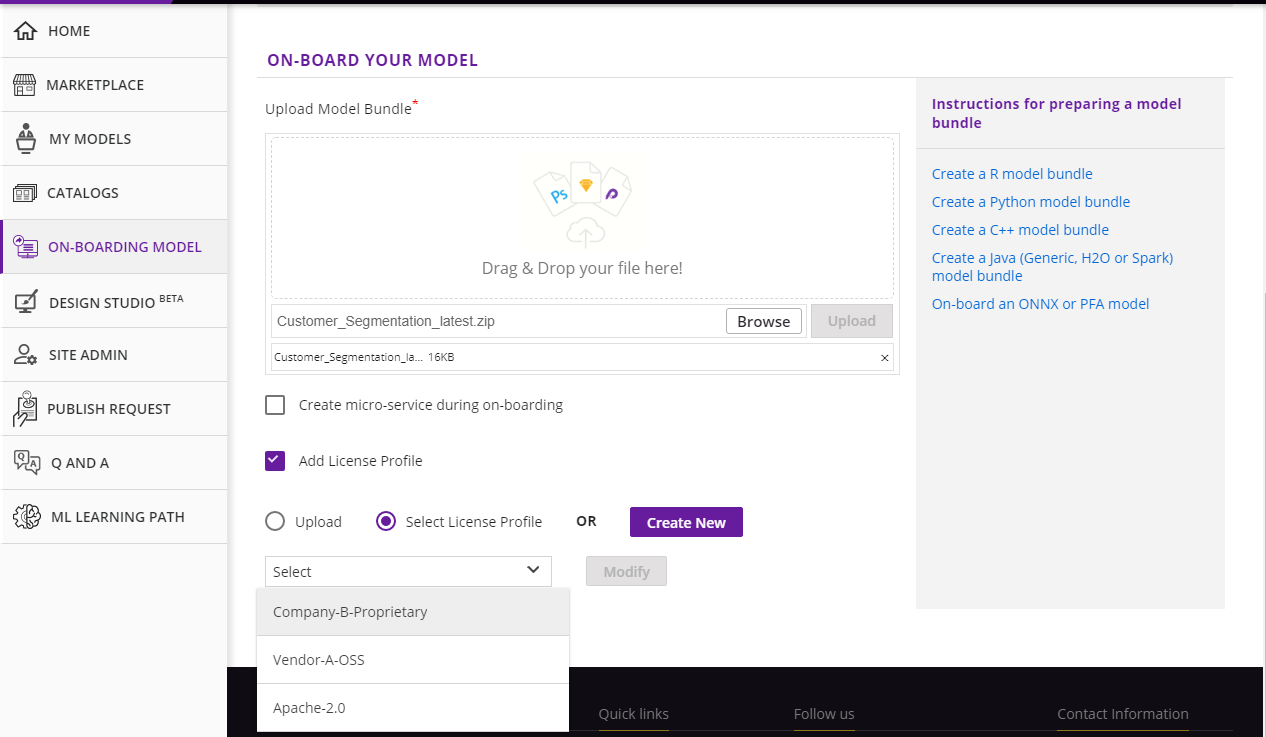
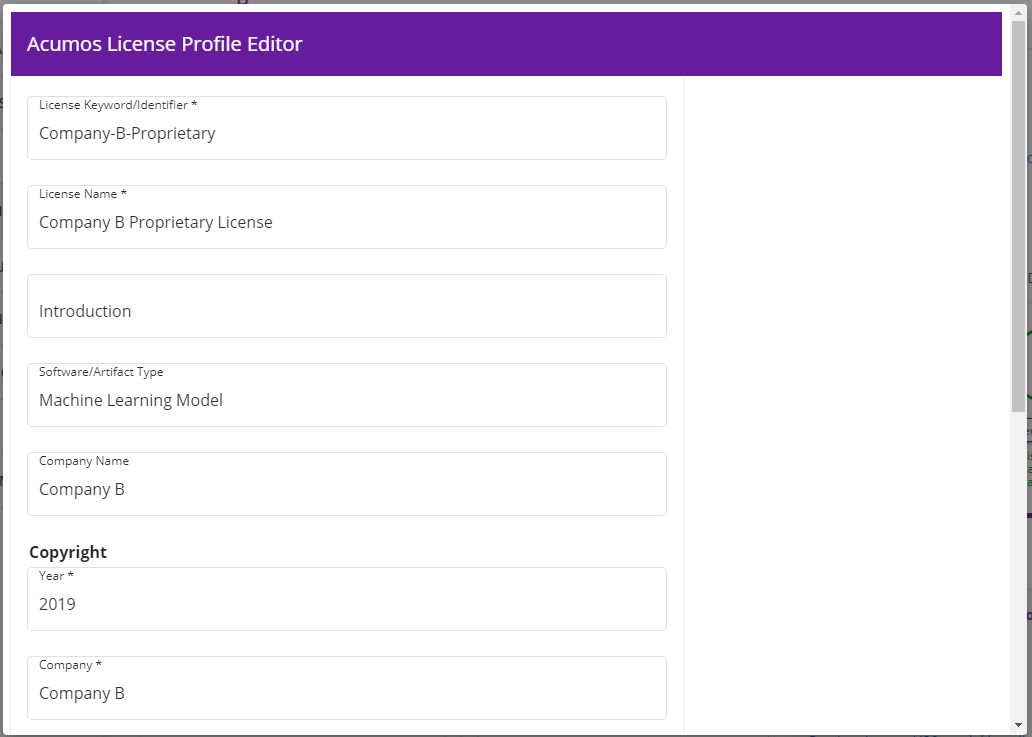
Upon clicking the Modify button a pop-up will be opened which allows the user to change license templates content. The Save button will save the license template.
The Create button will allow the user to create a new license template.
