Data Brokers
A Data Broker retrieves the data from passive data sources and converts it into protobuf format. The Data Broker provides the data to the Models via the Model Connector. The Model Connector explicitly requests the Data Broker retrieve data from data sources, receives the data in response, and provides the data to the Models.
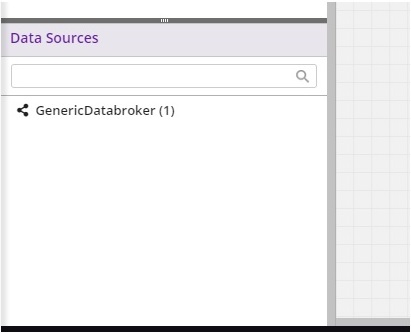
Data Brokers are displayed in Data Sources palette in the lower left corner of the Design Studio.
Acumos supports the following types of Data Brokers:
- Database Data Broker (SQL DataBroker)
- File system Data Broker (HDFS File System, UNIX, Hadoop, CSV, JSON)
- Network Data Broker (Router, Switch, etc.)
- Zip Archive Data Broker.
Note
The Data Broker functionality requires that specific a “Data Transformation & Toolkit” model be on-boarded in order for the functionality to be enabled. If you do not see Data Brokers in the Data Transform Tools palette, contact your Acumos Admin for further information.
Working With a Data Broker
DataBrokers are displayed in the Data Sources palette.
Create/load a solution in Design Studio.
Select the GenericDataBroker (latest version) from the list of “Data Sources” and drag onto the canvas
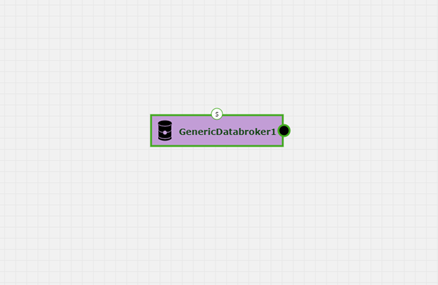
Connect the GenericDataBroker output to the input of the first model
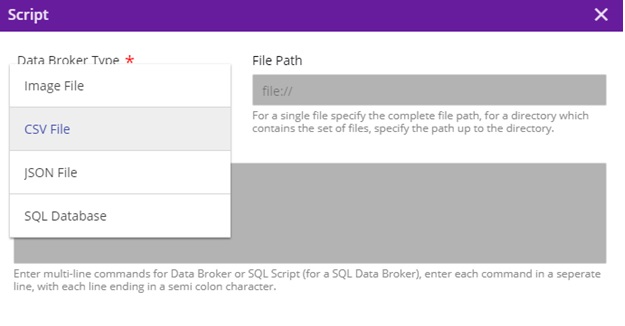
Select the “S” port at the top of the GenericDataBroker node, which will bring up the “Script” dialog popup
On click of “s” port of the Data Broker to allow input a free form text – a set of (one or more) Database SQL statements or a set of file system scripts. Note: these scripts are passed on to the Data Broker after they get deployed by the MP – Portal
Script Entry UI has the ability to edit (add, delete, modify, copy and paste) the script.
The Design Studio has the capability of storing the script and validating it from the UI after clicking on the Done button, which saves this into a back end CDUMP file. When reloading the solution on the design canvas, the saved script from the CDUMP file is loaded as well.
The current databroker supports csvDatabroker and sqlDatabroker. The user will need to enter following details:
CSV Databroker
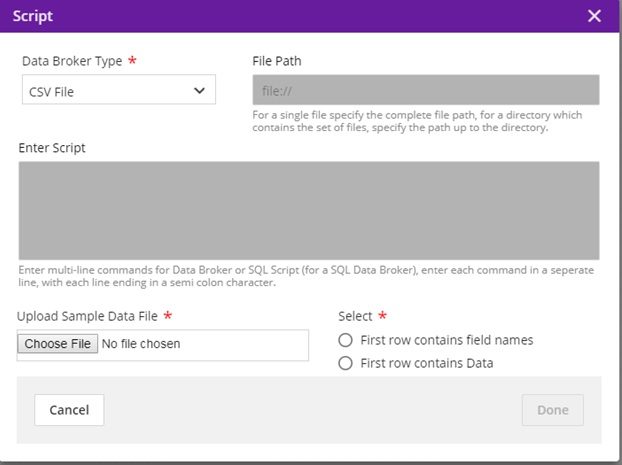
Data Broker Type = CSV
File Path = Will be populated during deployment
Enter Script = Will be populated during deployment
Choose File = select a sample CSV file with your test data from the local machine, which has the format e.g. for a model that takes two double values:
f1,f2
2.0,4.0
Select “First row contains field names” or “First row contains data” based on the file uploaded
Click Done
SQL Databroker
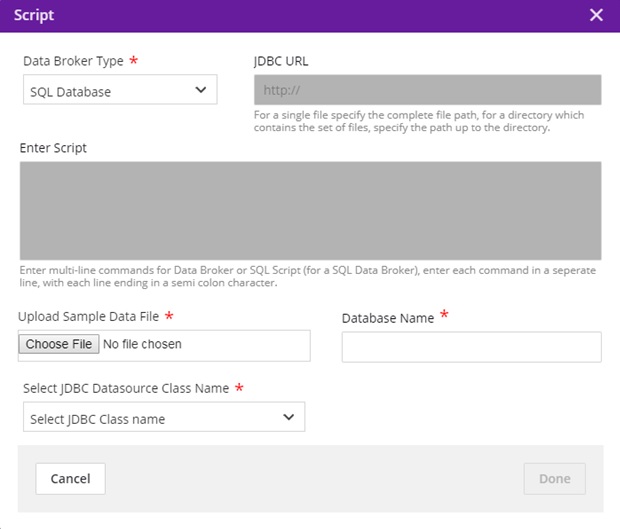
Data Broker Type = SQL
JDBC URL = Greyed out
Enter Script = Greyed out
Choose File = select a file with CREATE TABLE schema loaded in it, in order to parse the table contents for mapping. (Table Name and table field details are retrieved from the schema.)
Select the jdbc driver name from the dropdown which supports the file uploaded. (Currently, we only support mysql)
Enter the database name in which the table is present. It will be shown as below.
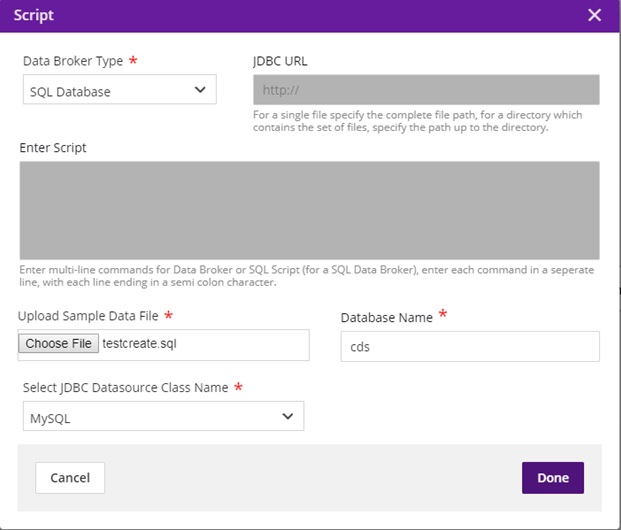
Click Done
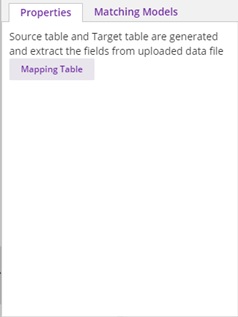
Auto-Generating Source Table from Script
After the user clicks on “Done” button, if the schema file is valid, the file contents will be parsed, field names will be extracted, and the source table will get auto-populated. The source table can be viewed by clicking on the “Mapping Table” button present in the properties. If the schema file cannot be parsed, an error message will be displayed.
The Target table will be generated by using the single protobuf file of one of its input messages. After connecting the ML Model to the Data Broker output, click on the output port of the Data Broker. Then the property box will display the protobuf input message of the ML Model.
Auto-Generating Target Table from Protobuf File
Once the output of Data Broker is connected to the input of ML model, the Data Broker acquires its message signature and generates the target table as per the protobuf specification. The Target table contains the N number of rows, where N is number of basic field types in the protobuf message (basic field name and basic field type).
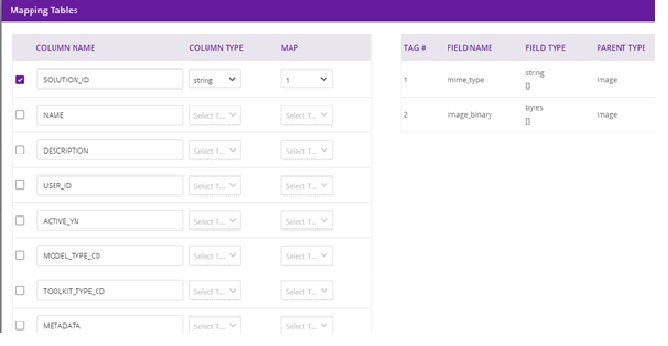
On the right, under Properties, select Mapping Table and the resulting dialog should display the following:
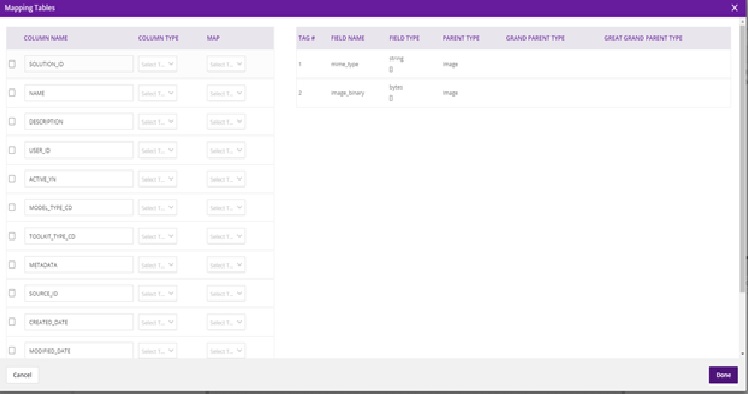
Select each source field from the table, select the field type from the drop down, and the target tag to be mapped to the field. The target tags are captured from the protobuf specification of the model that is connected to Data Broker. When you have mapped all fields, select Done.
The Design Studio will save the Source-Table-to-Target-Table mappings in the CDUMP file when the Save button is clicked. The Design Studio will retrieve the saved mappings from the CDUMP file and display the them in the Property Box when reloading the solution in the design canvas.
Saving
Above the canvas, select the Save button and enter the details of the solution. This will be saved in “My Solutions” area.
Deploying
To generate a TOSCA blueprint for deployment to a cloud environment, select the Validate button. If validation is successful, the deploy button will be enabled. On click of any of the cloud platforms, you will be redirected to the Manage my Model- Deploy to Cloud page. At this point, this model should be usable with the Data Broker when deployed.
Dockerizing the DataBroker
The Data Broker is implemented as a Java jar package. After the composite solution has been successfully validated in the Design Studio, the Composition Engine performs the following functions:
Retrieves the code of the Data Broker from a specific location in Nexus repository
Creates the Protobuf Wrapper for the Data Broker based on the output message that the Data Broker acquires at its output port when it is connected to an input port of an ML Model in the Design Studio. The input message is of Protobuf type string. This Wrapper converts:
- From Java to Protobuf types for the outgoing messages.
- From Protobuf to Java types for the incoming messages.
Creates the jar file of the Data Broker
Converts the jar to Microservices
Creates the Docker Image of the Data Broker Microservice from its jar file
Stores the Docker image of the Data Broker in the Docker repository (or Nexus repository)
Stores the location of the docker image in the TGIF.json of the Data Broker
Stores the location of the docker image in the Blueprint.json file (after successful validation)